Back Yard Farmer – Hatching Quail Egg Instructions

To achieve the best possible hatch rate, please follow these guidelines carefully


1 – Resting the Eggs

  • Upon arrival, allow eggs to rest at room temperature for 12–24 hours before incubation
  • Place them pointed end down during this time
  • Do not wash or clean the eggs, as this removes the natural protective coating

2 – Egg Positioning (Important)

  • For incubation, place eggs pointed end down, blunt end up
  • This ensures the developing chick can access the air cell correctly before hatching

Alternative method (manual turning):

  • Eggs may be laid on their sides if turning by hand
  • Turn gently and consistently at least twice daily

3 – Hand-Turning Tip

  • When turning by hand, alternate the direction each time (back and forth)
  • Avoid rotating eggs continuously in one direction only
  • Simple method: mark one side “X” and the other “O”, then flip X → O → X → O each turn
  • This keeps the embryo properly centred and developing evenly

4 – Incubation (Days 1–14)

  • Preheat your incubator before setting the eggs
  • Temperature: 37.7°C
  • Humidity: 45–60%
  • Turn eggs at least twice daily (or use an automatic turner)

5 – Lockdown & Hatching (Days 15–17)

  • At the end of Day 14, stop turning the eggs (“lockdown”)
  • Adjust incubator settings:
    • Temperature: 37.5°C
    • Humidity: 80–90%
  • Do not open the incubator during this period
  • Chicks should begin hatching around Day 17

6 – During Hatch

  • Avoid opening the incubator while chicks are actively hatching
  • After the first chicks hatch, wait approximately 24 hours, then:
    • Remove only fully dry chicks
    • Close the incubator promptly to maintain humidity
  • Allow remaining eggs to complete hatching undisturbed

7 – Brooder Setup

  • Preheat brooder to 36°C before introducing chicks
  • Ensure chicks can move freely between warm and cooler areas
  • Reduce temperature by approximately 1°C every 2 days
  • Observe chick behaviour:
    • Too cold: chicks huddle tightly
    • Too hot: chicks spread out and pant

8 – Feeding

  • Feed 28% protein BYF Quail Starter Feed from day one
  • Provide feed ad lib (always available) for the first 3 weeks
  • Ensure constant access to clean, fresh water (use shallow drinkers to prevent drowning)


Additional Notes

  • Consistency is key — avoid fluctuations in temperature and humidity
  • Avoid unnecessary handling or opening of the incubator
  • Hatch rates may vary due to transport and incubation conditions

Revolutionising Quail Nutrition—The Natural Way – 5

At Back Yard Farmer, we believe that the best solutions often come from the garden, not a laboratory. We are thrilled to announce our new 5-Herb Botanical Blend, a premium upgrade to our quail feed that brings “clean-green” bio-security directly to your coop.

By blending Organic New Zealand grown Salvia ‘Amistad’, Rosemary, Mint, Lemon Verbena, and Bay Leaves, we’ve created a powerhouse formula that acts as a natural shield against pests while boosting bird vitality.

Why Now?

We’ve spent the last several seasons observing the challenges our New Zealand keepers face—from high humidity causing grain pests to the relentless pressure of mites and flies in our summer months. We didn’t want to just offer another chemical fix. We waited until we could perfect a ratio that is safe, highly effective, and stabilized with Salmon Oil and Lypoforte for maximum absorption. It’s the result of months of testing to ensure your quail get the very best of nature’s pharmacy.

A Functional Shield, Not a Filler

Our organic botanical blend fits right into the growing body of research on phytogenic feed additives. These plant-based supports improve digestion, immunity, and antioxidant levels without the need for antibiotics. By including these five specific organic herbs, we help your birds fight off mites, lice, and internal stress naturally.

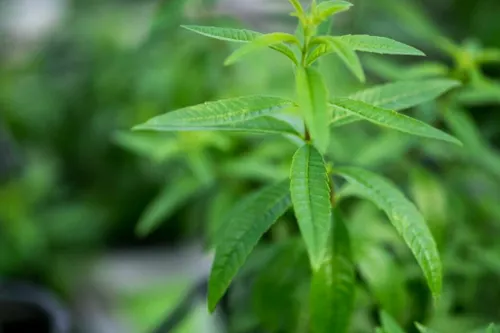
The Fly-Zone Defender – Lemon Verbena

Headline: The Final Piece – Zesty Bio-Security with Lemon Verbena

We wrap up our “Super-Herb” series with the bright, aromatic power of Organic Lemon Verbena.

Why it’s the perfect finish:

  • Fly & Gnat Defence: Packed with citral, Lemon Verbena is a specialist at masking the scents that attract flies and gnats to the coop. By including it in the feed and dust bath, you’re creating an invisible aromatic barrier.
  • Stress Reduction: The calming scent and phytochemical profile help reduce environmental stress, keeping your layers calm and productive.

The Back Yard Farmer Difference: By bonding these five organic herbs to our feed with Salmon Oil and Lypoforte, we’ve created a dust-free, nutrient-dense, and bio-secure meal that represents the best of New Zealand farming.

Ready to upgrade your flock? Our new 5-Herb Botanical Blend is available now. Experience the natural difference in every egg!
Optimizing Hatchery Biosecurity: The Science Behind Our New Environmental Controls

To ensure the highest standards of avian health and chick vitality, we have upgraded our hatchery with an advanced, dual-action mechanical ventilation and air-filtration system. Poultry environments – particularly during the brooding phase – naturally generate high volumes of microscopic feather dander, dried droppings, and feed dust. Left unmanaged, these airborne particulates act as physical vectors, carrying and spreading opportunistic pathogens, mold spores, and fungi throughout the space. By introducing a centralized, high-efficiency “scrubber” system at table height, we actively intercept and trap these respirable dust particles right at the source, preventing them from settling or irritating the birds’ sensitive respiratory tracts. Simultaneously, our calibrated, variable-speed extraction system maintains optimal cross-flow ventilation. This continuous exchange of air prevents the dangerous accumulation of metabolic byproducts like carbon dioxide and ammonia gas – both of which can severely suppress chick immune systems and damage respiratory cilia. By systematically drawing fresh oxygen in and exhausting stale, humid air out, we dramatically lower the ambient bacterial load and moisture levels required for fungal growth. The result is a mathematically optimized microclimate that suppresses pathogen transmission, eliminates ammonia odors, and provides our quail with the pristine air quality essential for robust early development.

QUAILS and LIGHTING PROGRAM

Getting the Lighting Right for Coturnix coturnix

Lighting is one of the most important environmental controls in quail farming, particularly if you want hens to maintain a high and consistent level of egg production throughout the year

COTURNIX COTURNIX are strongly influenced by the length of the day In the wild, increasing day length in spring signals that conditions are becoming favourable for breeding The same biological response occurs in domesticated quail

Light is detected not only by the eyes Birds also have specialised photoreceptors within the brain that respond to light reaching the head Increasing day length stimulates the reproductive system through the hypothalamus and pituitary gland, ultimately promoting ovarian development and egg production

For the backyard farmer, however, you do not need to understand all of the reproductive physiology to manage lighting successfully The important principle is simple

If you want quail to continue laying well, give them a long and consistent day, followed by a proper period of darkness


1 – How Much Light Do Laying Quail Need?

For actively laying hens, I recommend a total photoperiod of approximately 15–16 hours of light per day, including both natural daylight and artificial light

For example, if natural daylight provides 10 hours, the timer can provide another 5–6 hours

I prefer 16 hours as the maximum, rather than trying to provide light for 17, 18 or more hours More light does not necessarily mean more eggs Once the birds have received sufficient stimulation, extending the photoperiod further provides little advantage and may interfere with their normal daily rhythm

Just as important as the light is the darkness

Give the birds a proper dark period

A laying flock should have approximately 8 hours of darkness every night

Darkness is not wasted time It is an essential part of the bird’s daily biological rhythm It allows the birds to rest and maintain their normal circadian cycle

Do not leave the lights on continuously

A lighting programme should therefore provide a clear distinction between day and night


2 – The Most Important Rule – Never Suddenly Reduce the Day Length

Once hens are established in lay, do not suddenly reduce their total daily light exposure

This is particularly important when artificial lighting is being used to maintain production through autumn and winter

A reduction in day length is interpreted by the bird as a seasonal signal In nature, shortening days indicate that winter is approaching The reproductive system responds accordingly and egg production can decline

Therefore, once a laying flock has been brought onto a long-day lighting programme, maintain that photoperiod consistently

For example, if your hens are receiving 16 hours of total light each day, do not suddenly change them to 12 hours simply because the natural daylight is changing


3 – Lighting Young Quail

Young quail have different lighting requirements from laying hens

The objective during the growing period is to encourage healthy growth without unnecessarily stimulating the reproductive system too early

During the first few weeks, the priority should be feeding, drinking, warmth, growth and normal activity, rather than maximum light exposure

A practical programme is

AgeApproximate LightMain Objective
0–1 week20–24 hours*Ensure chicks can easily find feed and water
2–4 weeksAbout 8–12 hoursNormal growth and development
5 weeksAbout 12–14 hoursBegin preparing females for lay
6 weeks onward15–16 hoursMaintain reproductive stimulation and egg production

*The very long lighting period sometimes used immediately after hatching is primarily a management tool to ensure newly hatched chicks readily find feed and water It is not necessary to maintain continuous lighting as the birds get older

There is no need to make the transition complicated The important thing is to increase day length gradually as the pullets approach maturity


4 – Increasing Light Before Lay

COTURNIX COTURNIX mature very quickly and can begin laying at around 6–8 weeks of age, depending on genetics, nutrition and management

As the pullets approach maturity, gradually increase their daily photoperiod

I prefer to increase the lighting by approximately 30–60 minutes per week, rather than making a sudden large increase

For example

Week 4: 10–12 hours
Week 5: 12–13 hours
Week 6: 13–14 hours
Week 7: 14–15 hours
Week 8: 15–16 hours

This does not have to be followed to the minute The purpose is to provide a gradual increase in day length as the birds approach sexual maturity

Once the hens are in production, maintain the chosen photoperiod consistently


5 – Natural Daylight Plus Artificial Light

For a backyard flock, there is no reason to ignore natural daylight

The total photoperiod is what matters

For example

Summer
Natural daylight = 14 hours
Artificial light = 1–2 hours
Total = approximately 15–16 hours

Winter
Natural daylight = 9 hours
Artificial light = 6–7 hours
Total = approximately 15–16 hours

A programmable timer makes this very easy

I prefer morning supplementation

Where possible, I prefer to add artificial light before sunrise rather than extending the evening

For example, if natural daylight begins at 7.00 am, the artificial lights can come on at 5.00 or 5.30 am

The lights then go off when natural daylight is established

In the evening, the birds can naturally settle down as daylight fades

This arrangement has another advantage If there is a power failure, the birds are less likely to be suddenly plunged into darkness while they are still active


6 – Avoid Sudden Darkness

One problem with artificial lighting is switching the lights off abruptly while the birds are still active

Quail naturally become accustomed to the gradual reduction in daylight at sunset If artificial lights are providing the entire evening, suddenly switching them off can leave the birds disorientated

Morning supplementation largely avoids this problem

If evening lighting must be used, a gradual dimming system can be useful

For most backyard farmers, however, morning supplementation is the simplest solution


7 – Light Intensity – Bright Is Not Better

The objective is not to make the quail house as bright as possible

Quail have excellent vision and can be uncomfortable under excessively bright lighting Very bright conditions can also contribute to unwanted activity, aggression and feather pecking

I prefer moderate, evenly distributed lighting rather than a very bright light concentrated in one area

A level around 15–20 lux at bird level is a useful practical target for a laying flock, although exact requirements can vary with housing design and the type of lighting used

The important thing for the backyard farmer is that

  • Feed and water can be easily found
  • All areas of the cage receive reasonably even light
  • There are no extremely bright spots
  • The birds are not constantly exposed to harsh, glaring light

A small LED light can provide surprisingly good illumination in a quail house You do not need powerful household lighting


8 – What Colour of Light Should You Use?

The colour or spectrum of artificial light can influence birds because different wavelengths penetrate the head and interact differently with the birds’ visual and non-visual photoreceptors

Research in poultry and quail has investigated red, green, blue, white and other light spectra, with results varying according to intensity, photoperiod, age and production system

For practical backyard farming, I would not become overly concerned about buying expensive specialised poultry lighting

A warm or neutral LED light, providing comfortable and reasonably even illumination, is a sensible choice

Red-spectrum lighting has received particular attention in poultry research because longer wavelengths can have effects on reproductive development and production However, photoperiod and consistency are considerably more important management factors than chasing a particular colour of light


9 – Winter Lighting

Winter is when artificial lighting becomes particularly valuable

In southern New Zealand, natural daylight becomes considerably shorter during autumn and winter If the flock is allowed to follow the natural day length, egg production will normally decline

This is not necessarily a problem

It is simply the natural reproductive response of the bird

If you want eggs throughout the year, however, artificial lighting can maintain the longer photoperiod required for continued production

The easiest method is to use a timer to top up natural daylight to approximately 15–16 hours

For example, if natural daylight provides only 9½ hours, the timer might provide approximately another 6 hours

As spring approaches and natural daylight increases, gradually reduce the artificial-light period so that the total remains around the same target


10 – What Happens If You Use No Artificial Light?

There is nothing inherently wrong with allowing quail to follow the natural seasonal cycle

In fact, this is the simplest and most natural system

Under natural daylight, you should expect

Spring: Egg production increases as day length increases

Summer: Production is generally high

Autumn: Production gradually declines as days become shorter

Winter: Production can fall substantially, and some hens may stop laying

This is a normal biological response rather than a disease or nutritional deficiency

The advantage of natural lighting is simplicity and allowing the flock to follow its natural seasonal rhythm

The disadvantage is that you will have less consistent egg production throughout the year


11 – Lighting and Feed Must Work Together

Light stimulates the reproductive system, but light alone cannot produce eggs

Once the hen is stimulated to lay, she needs adequate energy, protein, amino acids, minerals, vitamins and water to support egg production

This is particularly important with Coturnix coturnix because they are capable of remarkably high production

Do not use additional lighting to push birds into high production if their nutrition is inadequate

A well-balanced layer feed, constant access to clean water and appropriate housing must accompany the lighting programme


12 – Keep the Lighting Programme Consistent

Quail respond well to routine

I recommend using a reliable automatic timer rather than manually switching lights on and off

The timer should provide approximately the same

  • Time the lights come on
  • Total daily photoperiod
  • Time the lights go off
  • Dark period

every day

A difference of a few minutes is of no practical importance What should be avoided is regularly changing the lighting programme by several hours


The Bottom Line

Lighting is one of the simplest and cheapest ways of controlling quail production

You do not need complicated equipment or expensive lighting systems

For a productive Coturnix coturnix flock, the basic principles are

• Young birds need appropriate lighting for growth and development

• Increase day length gradually as pullets approach maturity

• Maintain approximately 15–16 hours of total light for laying hens

• Give the birds about 8 hours of proper darkness every night

• Keep the lighting programme consistent

• Use artificial light during the shorter days of autumn and winter if you want year-round egg production

• Morning supplementation is my preferred method because it allows the birds to settle naturally at sunset

• Bright light is not necessary – moderate, evenly distributed light is preferable

Most importantly, remember that lighting is a management tool, not a substitute for good genetics, good feed, clean water, suitable housing and good flock management

When these factors are combined, a well-managed Coturnix coturnix flock can maintain excellent egg production for a large part of the year**

UPSIDE DOWN BANANA BOXES

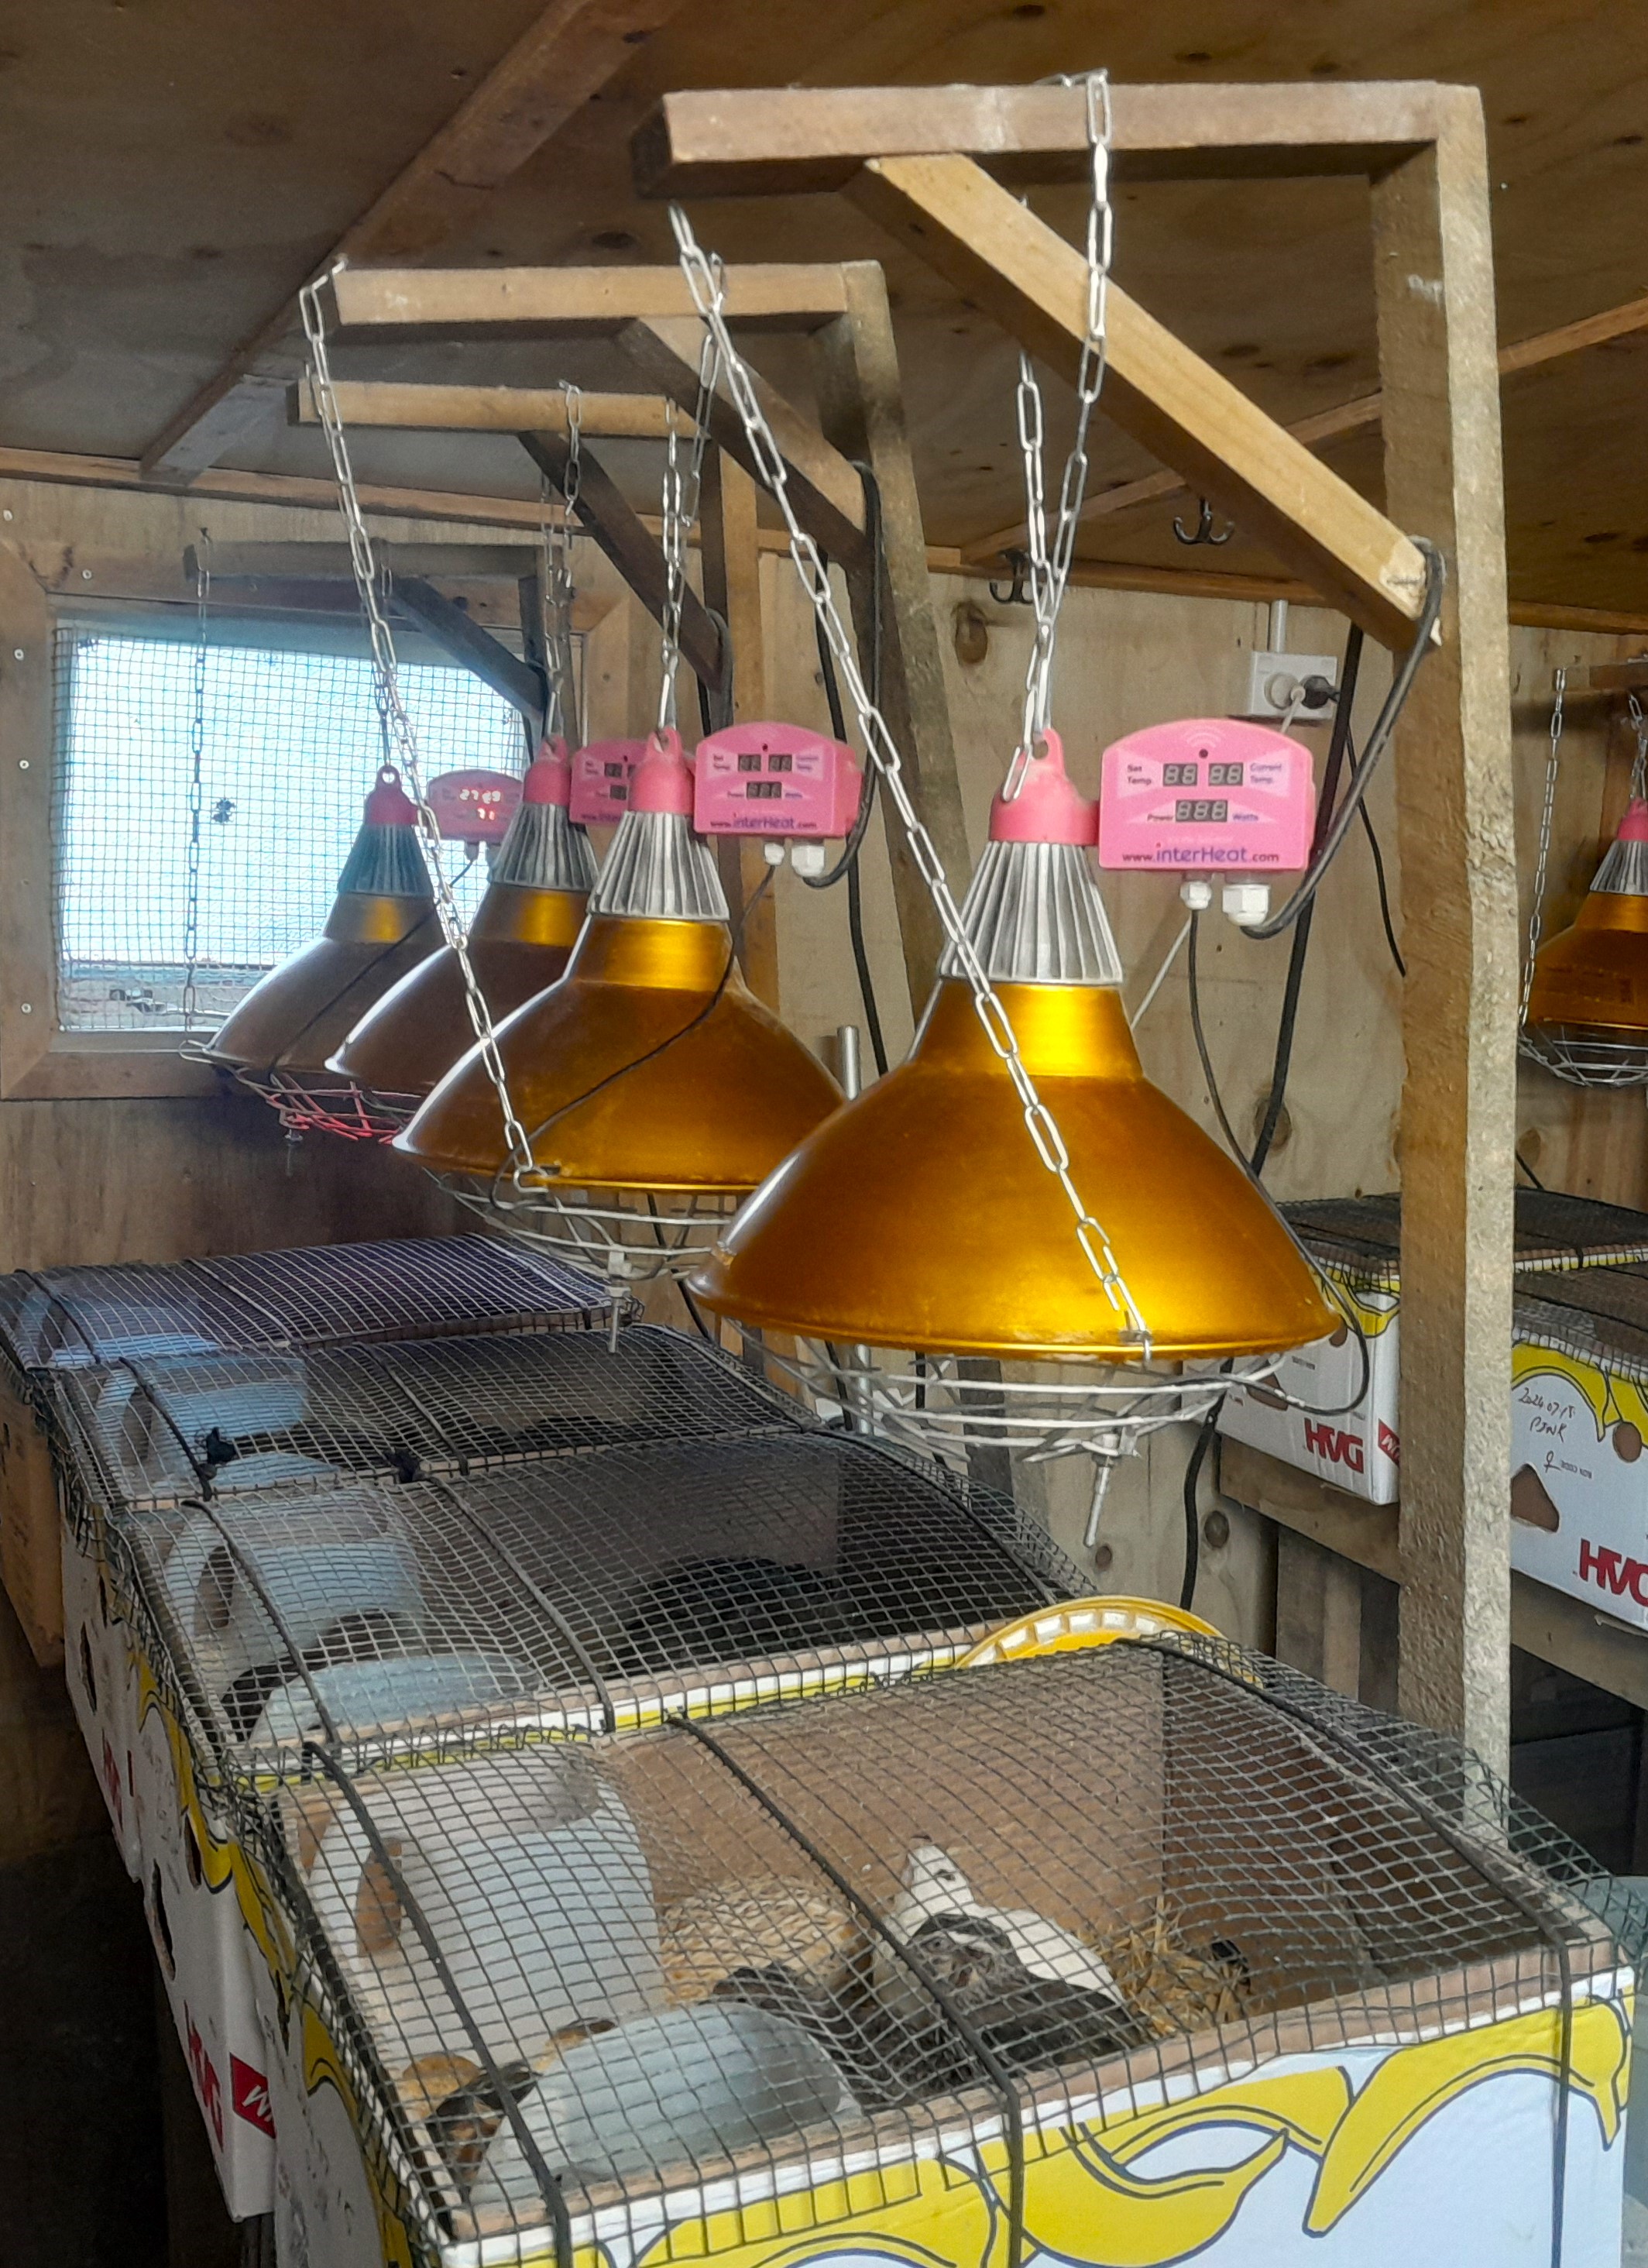
INSIDE TE HATCHERY

For many years I used plastic brooders to grow my small quails in and it worked very well. The problem came having to clean these all the time and since I replace about 10 of these in my hatchery every week, it became a very laborious and unpleasant task. A water blaster was the only way to clean them properly which created a lot of effluent as well. Alternatives were investigated and I settled on Banana Boxes. The advantage is that there is no cleaning as I just replace the used box with a new and clean one. The downside was that I had 10 manure and bedding “soiled” banana boxes every week. I solved this by flattening the boxes and turn them upside down in my garden with the manure and bedding underneath and the box on top. This makes a wonderful source of nutrients fertilising the soil and also an excellent weed mat.


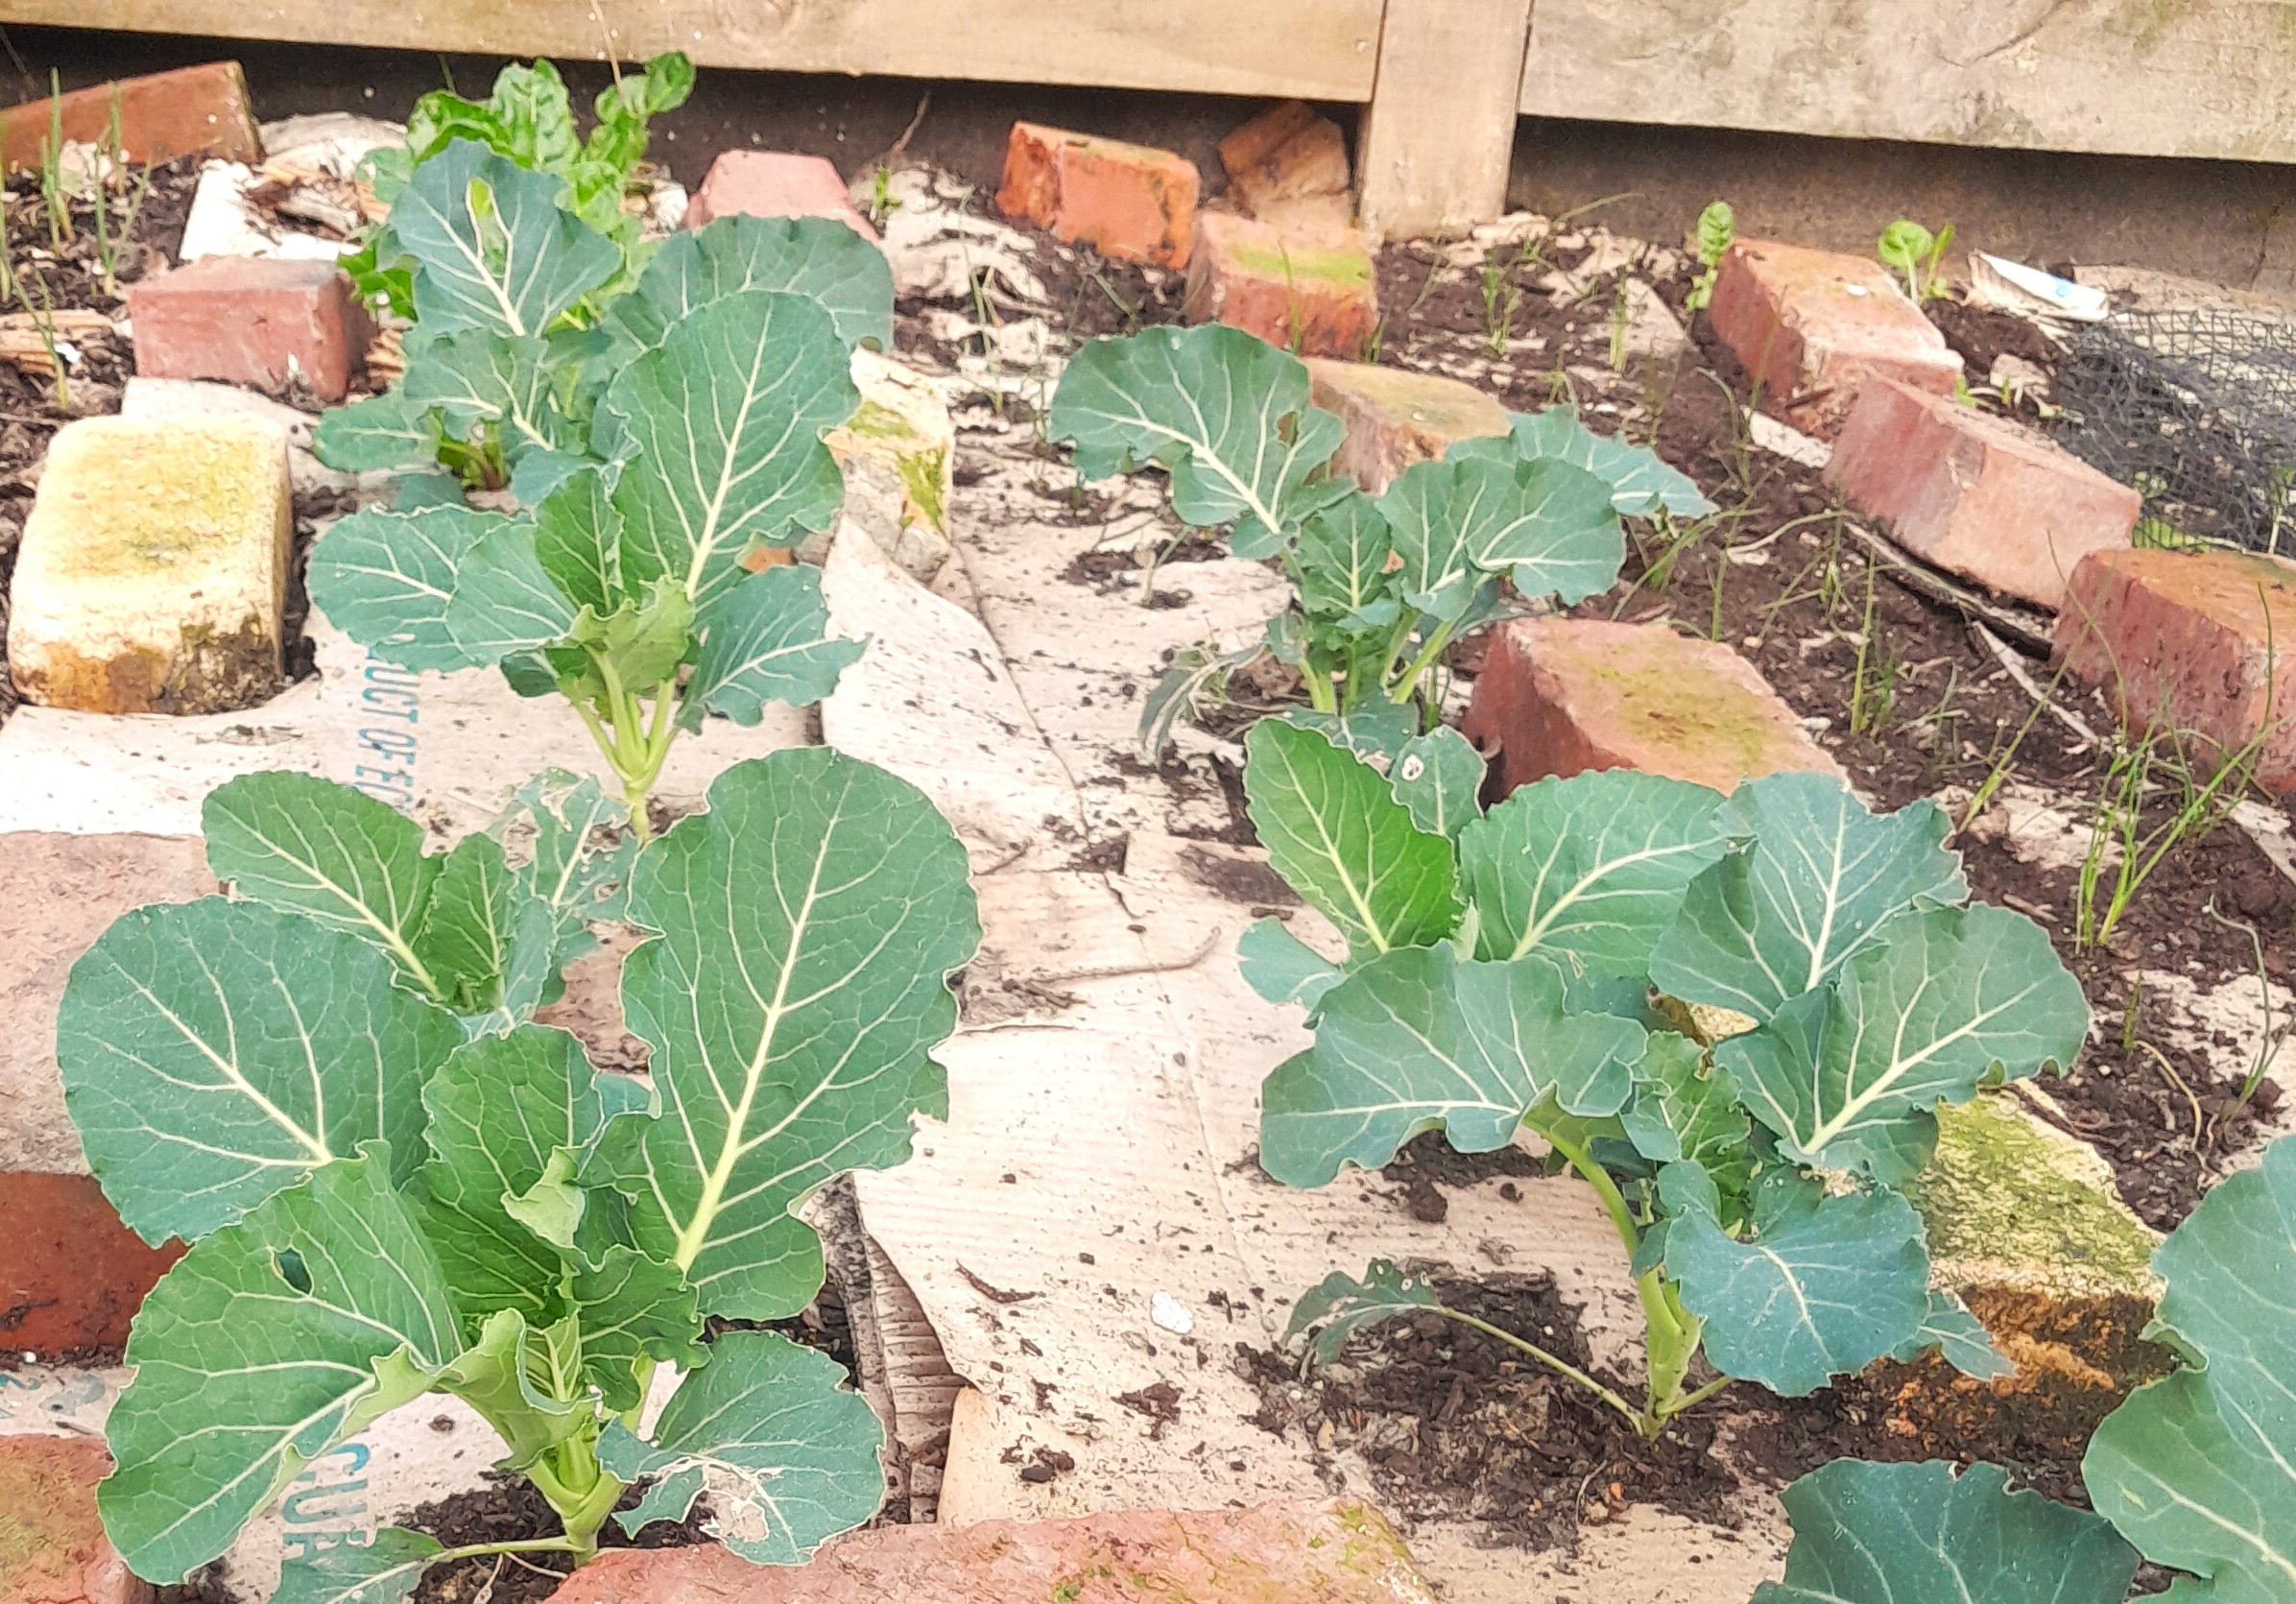
The results are excellent from a plant growth point of view and I have also not seen that many earthworms in all my live. I normally leave the boxes, well watered, for a couple of months before drilling a 40 mm hole about 200 mm deep through the box into the ground, fill it with good quality soil and plant the new plants or seeds it the hole. One needs to pack the boxes down in the beginning (I use old bricks) until the plants are stronger, otherwise the boxes move too much and the hole is not over the seed any more, or the small plants get damaged. After about 1 month the boxes have disintegrated and the bricks can be removed. The plants are now strong enough, weed free and well fertilised.

Ready to plant an Artichoke Forrest

One of the many Tomato beds ready for planting
Brassicas are very happy
Garlic is going very well
Boxes are well disintegrated after 6 weeks