


Cooking for Family and Friends

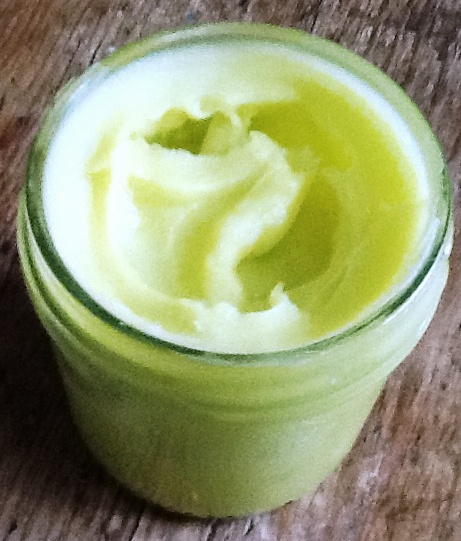
The face cream and the furniture polish have the same basic recipe. I quite like the thought of that! I did add vitamin E oil to the face cream and broke some lavender flowers in to the polish though.
The jury is still out regarding the moisturiser – some people in the family are allergic to all store bought creams and break out in rashes, pimples and is some cases small weeping sores from them – and it takes about 2 weeks of consistent use before the problems start. The product feels lovely on the skin and I, for one, ( no allergies) shall be using it during the winter on hands, feet, face and especially lips while working outdoors in the cold.
The furniture polish worked very well on my wood wardrobes, and one can use it for dining tables and all wood food prep surfaces since it does not contain any toxins.
Face Cream and Furniture Polish
1 part beeswax. If you are lucky enough to get your hands on honey combs you can clarify your own wax or you can buy some from beeswax suppliers.
3 or 4 parts olive oil depending on how soft you want the end product
Create a double boiler from two pots, the bottom one with water and a small spacer, I used a saucer, place the beeswax and olive oil in the top pot and heat. When clear and melted remove from the heat and add vitamin E oil or lavender flowers. Pour in to containers while hot and stir while cooling.
Apply the mix containing the vitamin E oil to your skin and the lavender scented mix to the furniture 😉

My home made still in full flight!
How to make Limoncello
1. Collect 1 Liter alcohol from the still (about 97 % Alcohol)
2. Peel the rind (no pith) from 8 organic, unwaxed smooth lemons and cut it in fine strips. Now put the alcohol and lemon peel in a glass container, shake, close and put in a cool dark place. Turn / shake the bottle once a day for about six weeks
3. Filter through a double muslin cloth and discard solids. Then filter the alcohol through a carbon filter as it results in a cleaner end product, if you do not have a carbon filter, just proceed after the muslin filtering
4. Dilute the alcohol with cool distilled water (made with the still) to a alcohol content of about 40 % (Use Pearson square).
5. Mix 1 Kg of sugar in the alcohol mixture and stir to dissolve well. Start with about 700 g sugar and taste the end product and keep adding small amounts of sugar, until you are happy with the sweetness of the end product
6. Bottle, label and store
ENJOY !!
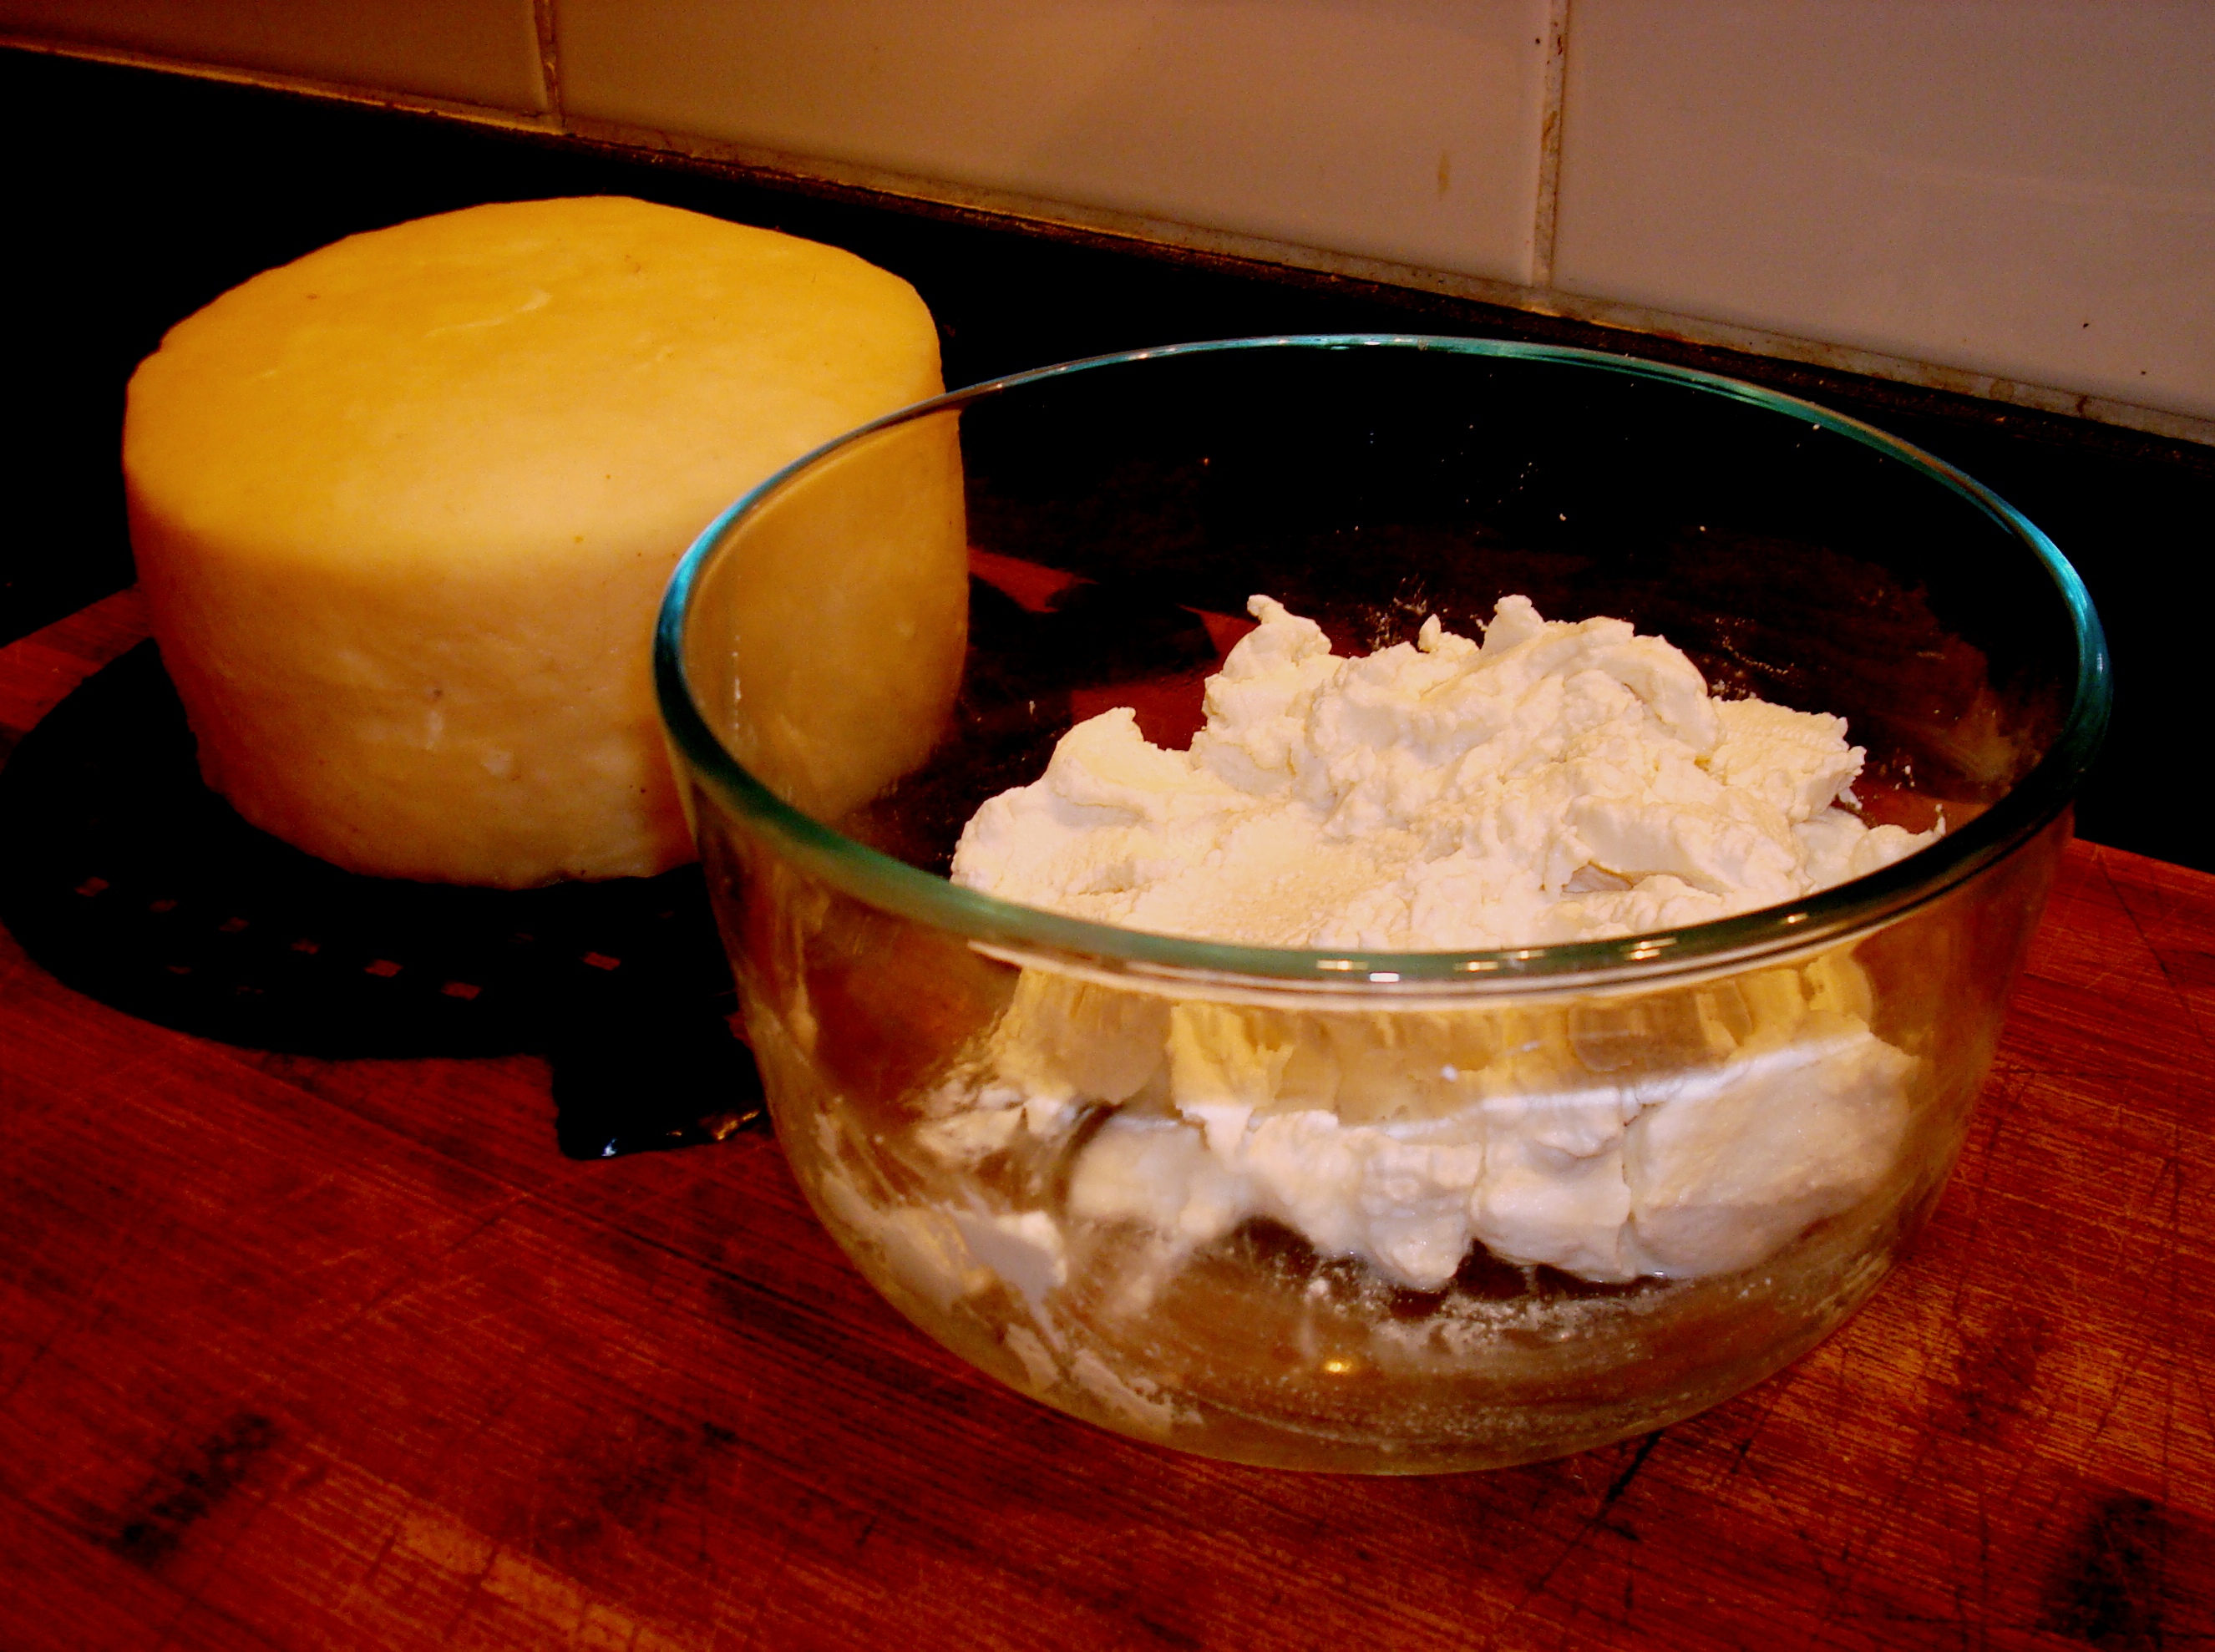
As we all know Ricotta is suppose to made from whey and not milk. Even though the whole milk version is not bad, nothing comes close to the real deal. I make milk Ricotta every time I fetch milk, which is about once every ten days. but only can make real Ricotta after I made a hard cheese, which is not every week. Last night the Montasio went well and after it was in the press, I made some Ricotta with the whey. Following breakfast and lunch, I had to be quick, otherwise there would have been no product left to photograph. Even though the yield from whey coming off ten liters of milk is not a huge quantity, but it made up in quality.
RECIPE
Fresh whey – less than two hours old
50 ml Apple Cider Vinegar
100 G Mesophillic Starter (I propagate my own cultures)
3 g Salt (Non iodised)
50 g Heavy cream – I made my own milk separator – simple and cheap – and will blog about it soon.
Put whey in a large non corrosive pot and heat over direct heat to 94 C. Stir continuously to prevent the whey from burning to the hot bottom of the pot, but do not boil
Turn the heat off and slowly ad the vinegar whilst stirring continuously. Small white particles will commence to form which is the precipitated protein (curds)
Ladle the curds carefully into a ricotta colander lined with fine muslin cloth. When all the curd is in the colander, allow to drain for about ten minutes and when no more visible moisture is present in the curds, then mix in the starter.
Tie the corners of the muslin and hang over a container to drain for about three hours. When the ricotta does not release moisture any more, untie the muslin and mix in the salt and cream
Store in refrigerator for up to ten days (It never lasts that long in any case).
One of the most common cheese products used in Italian cuisine
BUON APPETITO !!
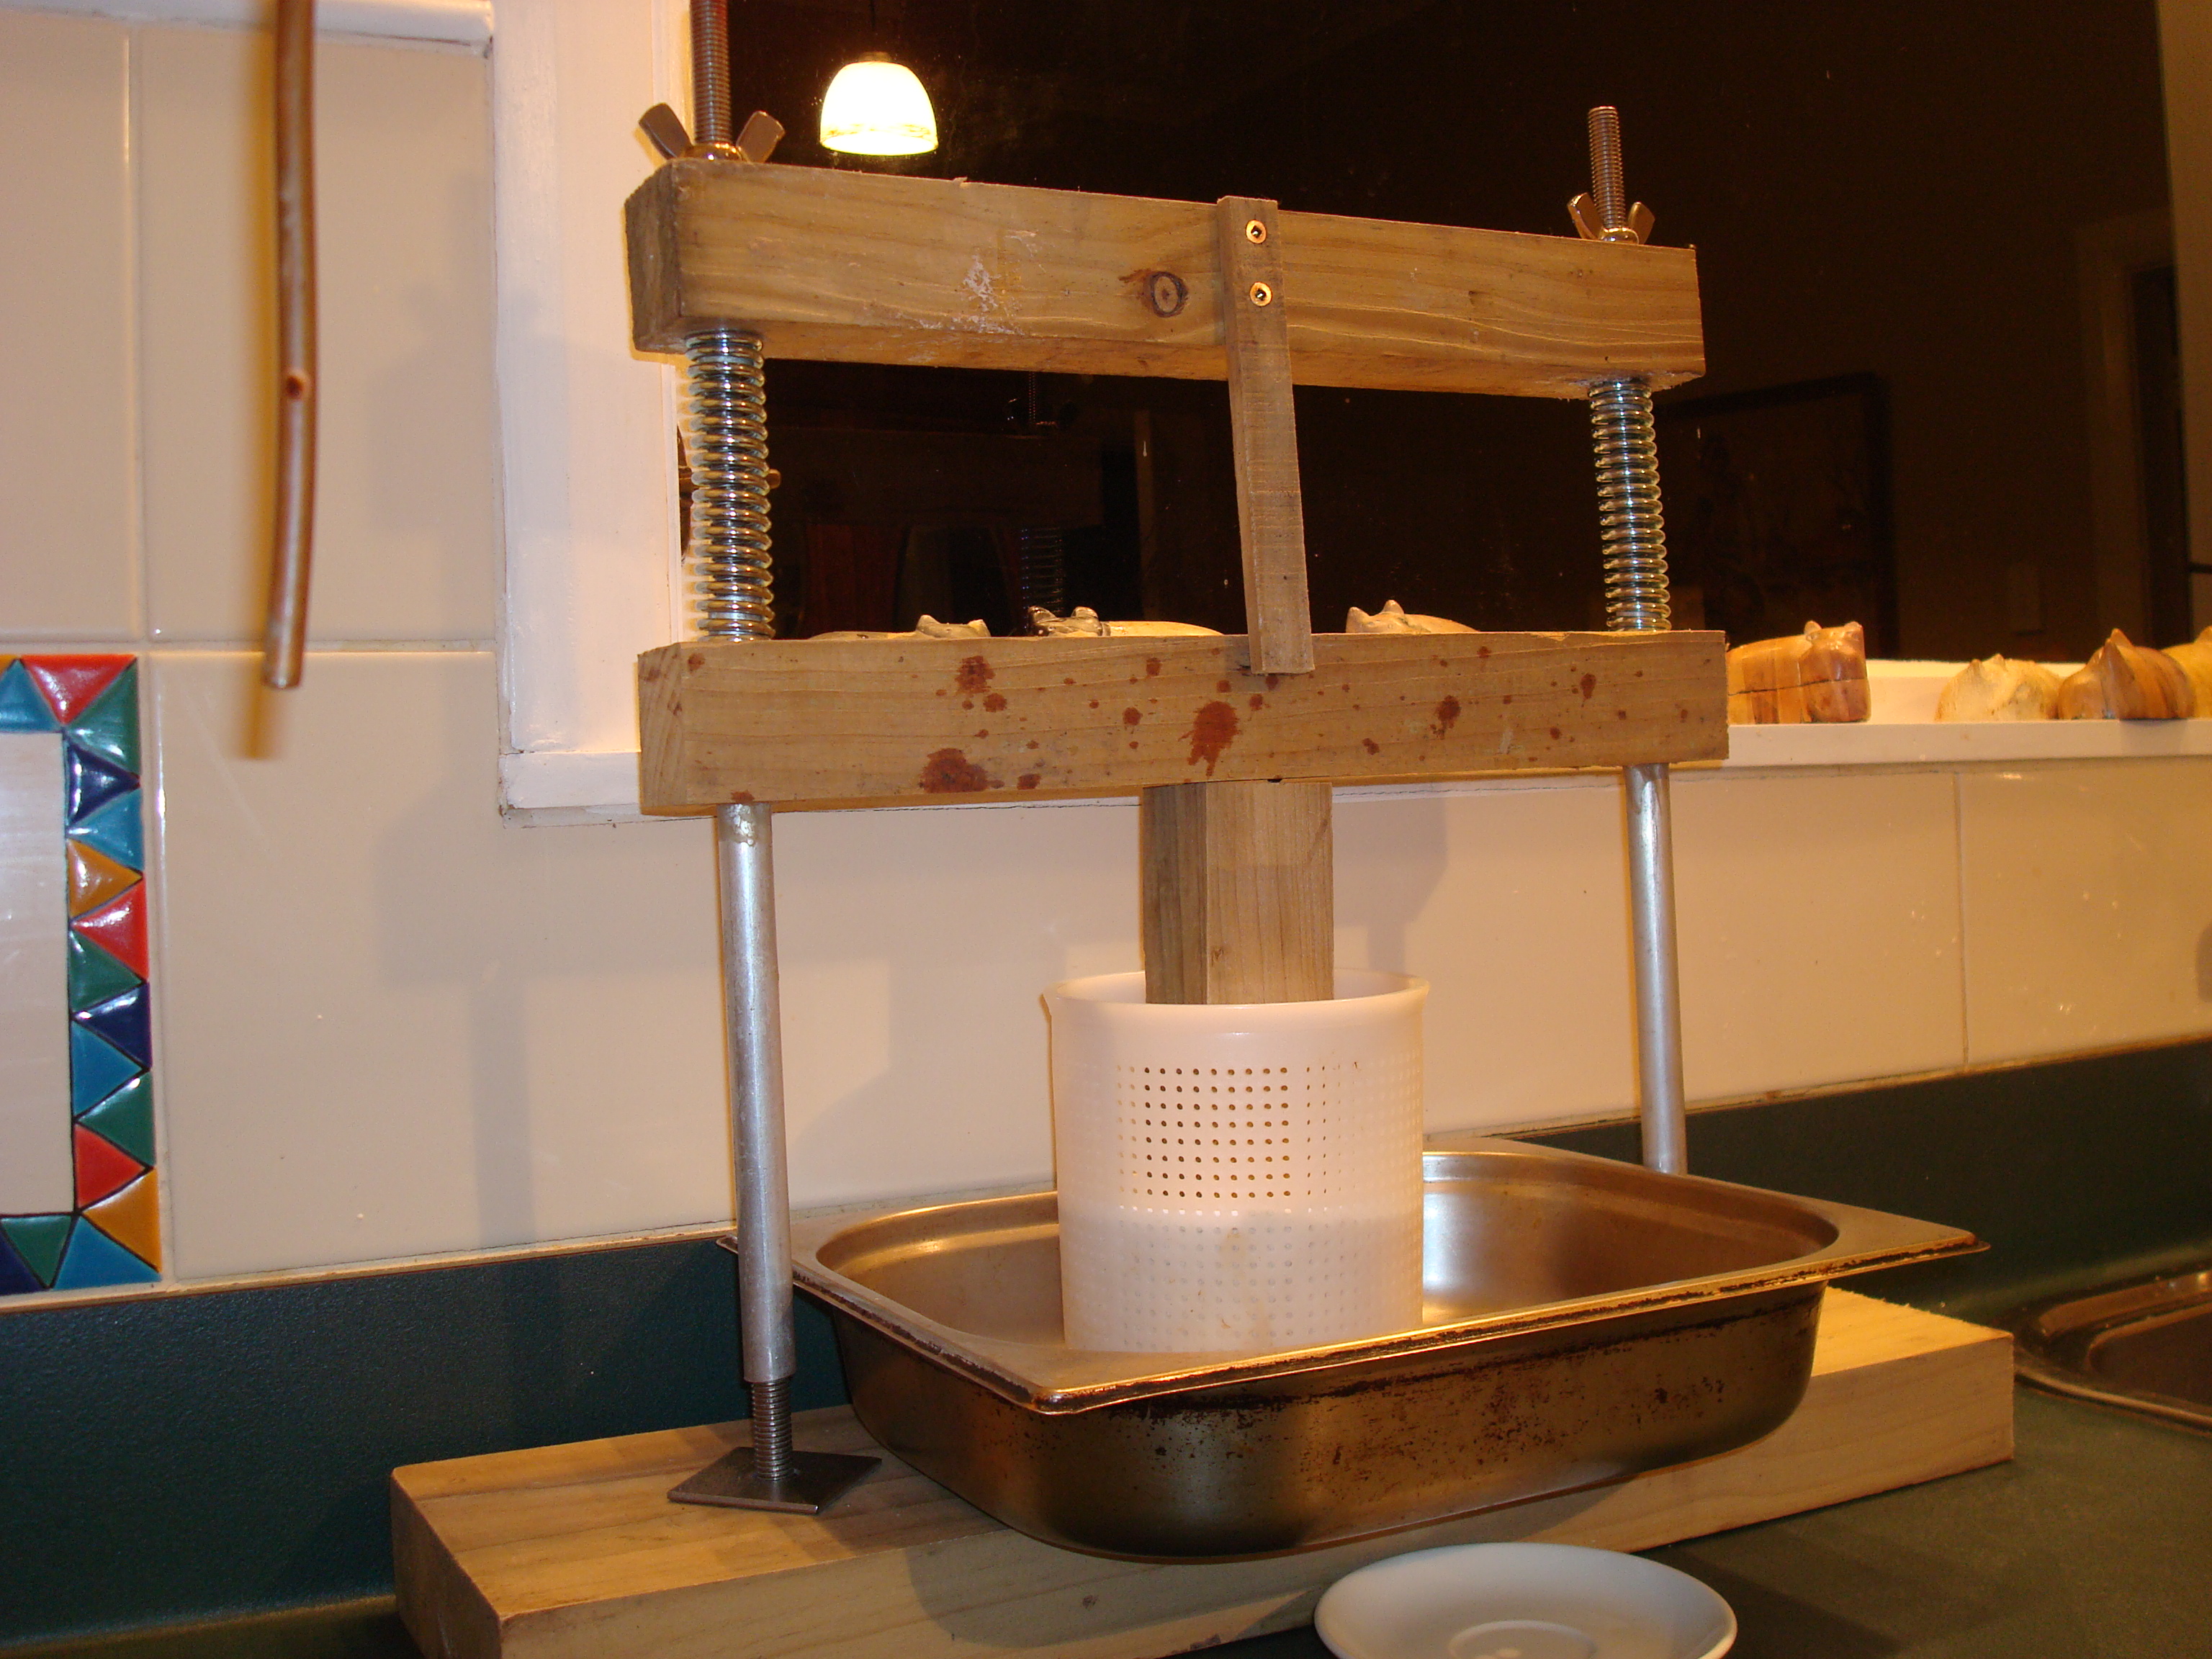
My Cheese Press was made from a couple of pieces of spare wood, plus I purchased one threaded rod, a couple of wing nuts and washers and two compression springs – all for less than $30. After manufacture, I calibrated the press with the wife’s bathroom scale and it can press from 0.5 – 10 Kg of cheese at 0 to 50 Kg of pressure. Also I stole a baking tray to serve as dripping tray (I hope the wife does not read this, as I had to drill a hole in the tray)
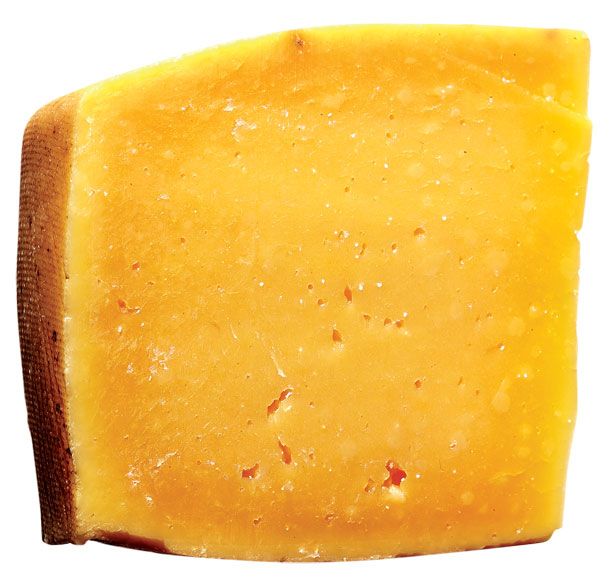
If you have not tasted Fricco before, it is definitely worth the while to spend the time and make Montasio for your next Fricco experience
Today I made some Montasio Cheese, but broke all the rules. Traditionally it is made from cow milk (Rule 1 – I used goat milk). Also the milk is normally collected from two milkings, i.e. morning and evening (Rule 2 – I got milk from my goat farm from a single milking). In Gorizia a region of Friuli Venezia Giulia in Italy milk is collected from three different bovine races i.e. Friesian, Swiss Brown and Pezzata Rossa (Rule 3 – Unfortunately I could get only Saanen goat milk). So I am sure I would not get a DOP trademark certification for my cheese, but still am of the opinion that it would not be too bad. Montasio is a “cooked” cow milk cheese so we need to process it at 41 degrees C. This is why we use two different starter cultures – Mesophillic as well as Thermophillic starter.
Montasio in New Zealand is best made from Jersey milk and I shall be making another batch with Jersey milk next week – unfortunately I shall have to wait for months to make the comparison between the two cheeses. Montasio is normally aged three different ways to give three different types of cheeses :
Fresh – This is consumed after 60 – 90 days ripening
Mature – Consumed as a table cheese after 5 to 10 months of ageing
Aged – Used as a grating cheese if aged for periods in excess of ten months
Now for the recipe:
10 Liters of fresh unpasteurised milk
100 g Thermophillic Starter (I propagate my own cultures)
50 g Mesophillic Srtarter
5 ml Liquid Calf or Goat Rennet
1 Kg Plain Salt (Not iodised)
5 Liters of fresh water (Non chlorinated)
Heat the milk in a double cooker to 32 C and ad both the Starters. Stir well and cover and leave to ripen for 60 minutes, while keeping the milk at 32 C
Ad the Rennet and stir gently with a up and down motion for two minutes. Cover and keep at 32 C allowing the curds to to set. This may take up to 30 minutes for the curds give a clean break
Cut the curds in approximately 6 mm cubes
Heat the curds to 39 C, raising the temperature with maximum 1 C every five minutes, then hold at 39 C for 60 minutes. During this process stir the curd gently all the time to prevent it from matting.
Drain the curd and ad hot water to the curd to get the curd and water mixture to 44 C and hold at 44 C for ten minutes, while stirring gently all the time
Drain the curds and place in a cheesecloth lined mold immediately.
Press at 2 Kg for 15 minutes – remove the cheese and peel away the cheesecloth – Turn over the cheese and dress with cheesecloth and press at 2 Kg for 30 minutes. Remove the cheese and peel away the cheesecloth – Turn over the cheese and dress with cheesecloth and press at 5 Kg for 12 hours. Remove the cheese and peel away the cheesecloth – Turn over the cheese and dress with cheesecloth and press at 5 Kg for 12 hours.
Make a saturated salt solution, in a non-corrosive container, with the salt and water. Now soak the cheese in the solution for 4 hours, at room temperature, per Kg of cheese. Remove and pat dry
Store cheese at 12 – 15 C until ready to use. Turn over cheese oat least once every week.
ENJOY!!
