Peperoni Ripieni (Stuffed Red Capsicum)

Today, while I was building a Rooster Box to shut up Alvin (literally as well), Mrs BYF really delivered!! Peperoni Ripieni di Riso e Peperoni Ripieni Melanzane.

2015-03-09 - Peperoni Ripieni 3 2015-03-09 - Peperoni Ripieni 2 2015-03-09 - Peperoni Ripieni 1

We found some perfect, ripe, small capsicums, just right for a great antipasto. Half of them were stuffed with risotto made with onion, a bit of home made pancetta and one mushroom that had escaped yesterday’s lunch. The rest were stuffed with eggplant, and here is the recipe with a hearty Salute! to the great Marcella Hazan.

Pepperoni Ripieni (with eggplant) 

4 small peppers, if you are using large ones adjust the recipe to suit

1/2 cup fresh unflavoured breadcrumbs

1 tablespoon anchovies chopped

1 big pinch of oregano

1 tablespoon capers chopped

2 cloves of garlic (adjust to taste) chopped

1 ripe, fresh tomato, chopped. It should really be peeled but I could not be bothered

1/2 cup of fried eggplant chopped

2 tablespoons of fresh flat leaf parseley chopped

olive oil for sprinkling at the end. The fried eggplant will have enough oil so you do not have to add to the mix

pinch of salt

black pepper

retain 3 tablespoon of crumbs to sprinkle at the end

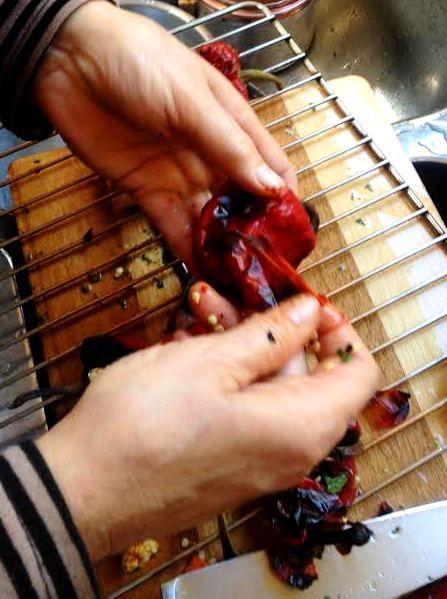
Place the whole peppers under the grill and roast on all sides until the skin is charred all over. Let cool and when you can handle them, remove the skin and seeds carefully. retain the ‘pocket’ shape of the pepper.  The roasting makes the flesh of the pepper dense and luscious and imparts a smokey flavour.  I always have fried eggplant in the fridge under oil but it is very easy to fry the eggplant in a bit of oil until soft. Slice the eggplant in slices about 1cm thick, sprinkle with salt and leave for 20 minutes at least. Rinse off the salt and dry well with a paper towel. Heat the oil in a heavy bottomed pan and and fry the pieces of eggplant without overlapping or overcrowding.

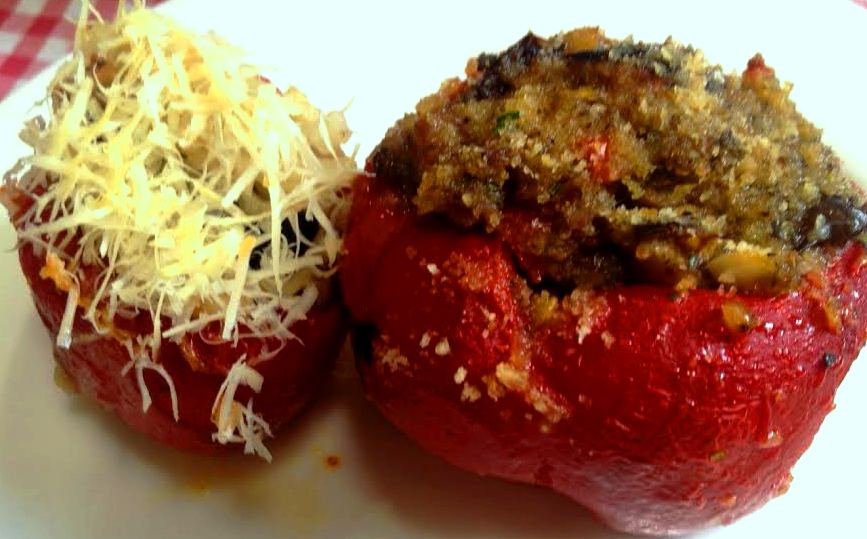
Mix and chop all the ingredients together, adjust the salt to taste. Stuff the peppers tightly with the mixture. Pack them in an ovenproof dish big enough to contain all of them and keep them from falling over. Sprinkle with the left over crumbs, add a tiny drizzle of olive oil, and bake for 20 minutes in an oven pre heated to 200 degrees

Remove from oven and leave to cool for about 10 minutes or bring to room temperature before serving. Do not refrigerate before eating.

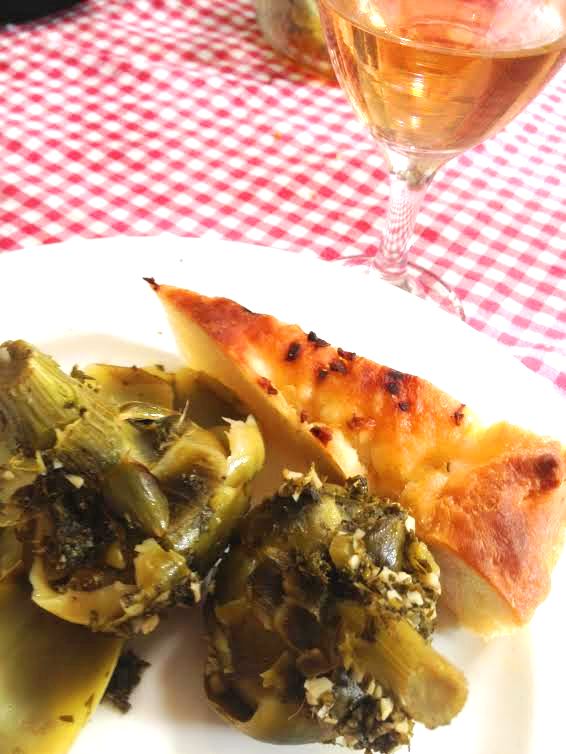
All of this enjoyed with some perfect red home made wine and afterwards I would be excused extending my siesta to 90 minutes in stead of the normal 60. ENJOY!!

Beetroot Tops Pie

2015-02-23 - Beetroot Top Pie 3


We have agreed the beetroot tops are more tasty than spinach so, today, Mrs BYF made a delicious pie out of the leaves and all the stems of the leaves. Even the thicker bits went in to the pan. The reds and greens of the leaves and stems were colourful and the slightly rough texture was very good. It was so good that I had to share the recipe.

PIE CRUST

This recipe works with sour cream or home made yoghurt, full cream, no light stuff. Greek style bought yogurt may work as well.

2 cups of self raising flour

1 cup butter cut in small cubes

salt

1/2 cup yogurt or sour cream

you can add a tablespoon of sugar if you are making a sweet pie

Whisk the dry ingredients in a bowl, add the butter and work the butter in until the mix resembles fine breadcrumbs. Add the cream or yogurt and mix and knead util the dough comes together. Refrigerate until needed

BEETROOT TOPS FILLING

1 large bunch of tops, well washed and roughly chopped. Use the tasty stems as well but chop the thicker ones finer

2 tablespoons or more of olive oil

pinch of chili

pinch of pepper

1/2 cup ricotta or soft cream cheese

2 table spoons of parmigiano cheese or any cheese you have on hand

1 egg

METHOD

Use a lidded pan that can hold all the spinach and add the olive oil and chili. Turn the heat to med high and cook the chili for a few minutes before adding all the tops. Do not add any water, the water clinging to the leaves after washing will be enough. Cover the pan and cook until just softened. Do not  over cook. Cool the leaves a bit and mix in all the other ingredients well.  Line the pie dish with the pastry keeping some to make the lattice over the top. Fill the pastry case with the filling mix, decorate with strips over the top and bake for about 30 min at 200 degrees.

Do not forget the red wine. ENJOY!


Artichokes (Carciofi alla Romana) and Foccacia light Dinner

2015-01-16 - Light Dinner

Not being very hungry tonight, I decided to pick a few artichokes and cook them the way the Romans do to enjoy with the foccacia I baked this morning.  A glass of my dry white wine complimented a simple and satisfying meal.

CARCHIOFI ALLA ROMANO ( adapted from one of the great Marcella Hazan’s recipes )

As many artichokes as you can fit snugly in your deep cast iron casserole or heavy bottomed pot. Keep about 50mm of stem attached to the artichoke because this is how the Romans serve them

1 lemon

2 or 3 cloves of garlic chopped fine. More if you like!

1 small handful of mint leaves chopped very fine

1 small handful of parsley chopped fine

salt

1/2 cup of oil

Prepare the artichokes by slicing about 25mm off the top of the artichoke getting rid of spikes and a lot of the inedible green parts of the leaves. Peel away the hard outer leaves of the artichoke until the white leaves have only a little green at the top. Peel the green outer layer off the stem. I use an apple corer to dig the choke out from the centre without damaging the base of the artichoke. As each artichoke is cleaned, drop it in a bowl full of cold water with the lemons squeezed in. Drop the halves of squeezed lemon in the water too. Mix the garlic, parseley, salt and mint in a bowl. Press most of it in to the cavities of the artichokes. Put the oil in the pot and place the artichokes stem side up in the pot. Rub the last bit of the garlic mix on the outsides of the artichokes. Add enough water to cover most of the artichokes, keeping the stems dry. Put the lid on tightly.  Cook on medium until tender when prodded with a knife. Serve with the sauce left in the pot poured over the artichokes. Eat the right away.  ENJOY and remember the wine!


Cardoon buds and yes, they should be eaten!

DSC03960DSC039522015-01-23 - Cardoon in Blompot2015-01-23 - Cardoon Flowers 2


Mrs BYF is fanatical about not wasting any food that the garden produces. Her attitude has resulted in many memorable dishes ranging from fantastic, better that any world class restaurant, etc. etc., to (seldom, I might add) never to be attempted again, EVER!

I was going to let the cardoon buds flower, because the bees love them, and ‘they’ say that only the stems should be eaten, but Mrs BYF commanded me to “bring them in!”.  After all the cardoons grow so well in Dunedin and my plants were well over 3 meters high with lots of flowers. They were all boiled in a big pot of water, with a squeeze of lemon and some salt, then peeled, chokes removed and the hearts put under oil.  The taste and texture of the hearts proved to be  sensational, perhaps a bit more starchy, at the same time almost creamy, than artichokes. We eat them as antipasto or on panini with  roast bell peppers (peperoni) and fried eggplant (melanzane). The real taste of Italy in Dunedin. Unbelievable !

Just to take the non wastage policy a bit further, Mrs BYF used the inedibles for  a lovely vegetable arrangement of rosemary, flowering cardoon and  fennel fronds. The cardoon flowers are beautiful and, surprisingly, sweet smelling.

Bruschetta al Pomodoro e Basilico

2014-12-04 - Bruschetta

100 ml Extra virgin olive oil
2 Cloves garlic – finely chopped
4 – 6 Slices home made bread or good Italian style bread like ciabatta
4 Fresh, ripe and sweet tomatoes – coarsely chopped
Small bunch basil
Generous pinch salt
Black pepper
In a large bowl, combine the chopped tomatoes, basil, black pepper, chopped garlic, salt and extra virgin olive oil , mix to combine. In the meantime toast a few slices of home made bread and rub with fresh garlic. Drizzle the warm bread with extra virgin olive oil. Cover the still warm bread with the tomato mixture, and serve immediately.  The trick is not to let the mix stand because it becomes watery. ENJOY !!