Back Yard Farmer – Hatching Quail Egg Instructions

To achieve the best possible hatch rate, please follow these guidelines carefully


1 – Resting the Eggs

  • Upon arrival, allow eggs to rest at room temperature for 12–24 hours before incubation
  • Place them pointed end down during this time
  • Do not wash or clean the eggs, as this removes the natural protective coating

2 – Egg Positioning (Important)

  • For incubation, place eggs pointed end down, blunt end up
  • This ensures the developing chick can access the air cell correctly before hatching

Alternative method (manual turning):

  • Eggs may be laid on their sides if turning by hand
  • Turn gently and consistently at least twice daily

3 – Hand-Turning Tip

  • When turning by hand, alternate the direction each time (back and forth)
  • Avoid rotating eggs continuously in one direction only
  • Simple method: mark one side “X” and the other “O”, then flip X → O → X → O each turn
  • This keeps the embryo properly centred and developing evenly

4 – Incubation (Days 1–14)

  • Preheat your incubator before setting the eggs
  • Temperature: 37.7°C
  • Humidity: 45–60%
  • Turn eggs at least twice daily (or use an automatic turner)

5 – Lockdown & Hatching (Days 15–17)

  • At the end of Day 14, stop turning the eggs (“lockdown”)
  • Adjust incubator settings:
    • Temperature: 37.5°C
    • Humidity: 80–90%
  • Do not open the incubator during this period
  • Chicks should begin hatching around Day 17

6 – During Hatch

  • Avoid opening the incubator while chicks are actively hatching
  • After the first chicks hatch, wait approximately 24 hours, then:
    • Remove only fully dry chicks
    • Close the incubator promptly to maintain humidity
  • Allow remaining eggs to complete hatching undisturbed

7 – Brooder Setup

  • Preheat brooder to 36°C before introducing chicks
  • Ensure chicks can move freely between warm and cooler areas
  • Reduce temperature by approximately 1°C every 2 days
  • Observe chick behaviour:
    • Too cold: chicks huddle tightly
    • Too hot: chicks spread out and pant

8 – Feeding

  • Feed 28% protein BYF Quail Starter Feed from day one
  • Provide feed ad lib (always available) for the first 3 weeks
  • Ensure constant access to clean, fresh water (use shallow drinkers to prevent drowning)


Additional Notes

  • Consistency is key — avoid fluctuations in temperature and humidity
  • Avoid unnecessary handling or opening of the incubator
  • Hatch rates may vary due to transport and incubation conditions

THE BYF NO-WASTE QUAIL FEEDER

Feed is the single most expensive item when keeping quails. It is therefore essential to prevent birds from contaminating or wasting feed. Back Yard Farmer has developed a simple, effective, and low-cost solution using a standard 3-litre plastic milk bottle.

This DIY feeder is easy to make, costs nothing, and outperforms many commercial feeders.


How to Make the Feeder

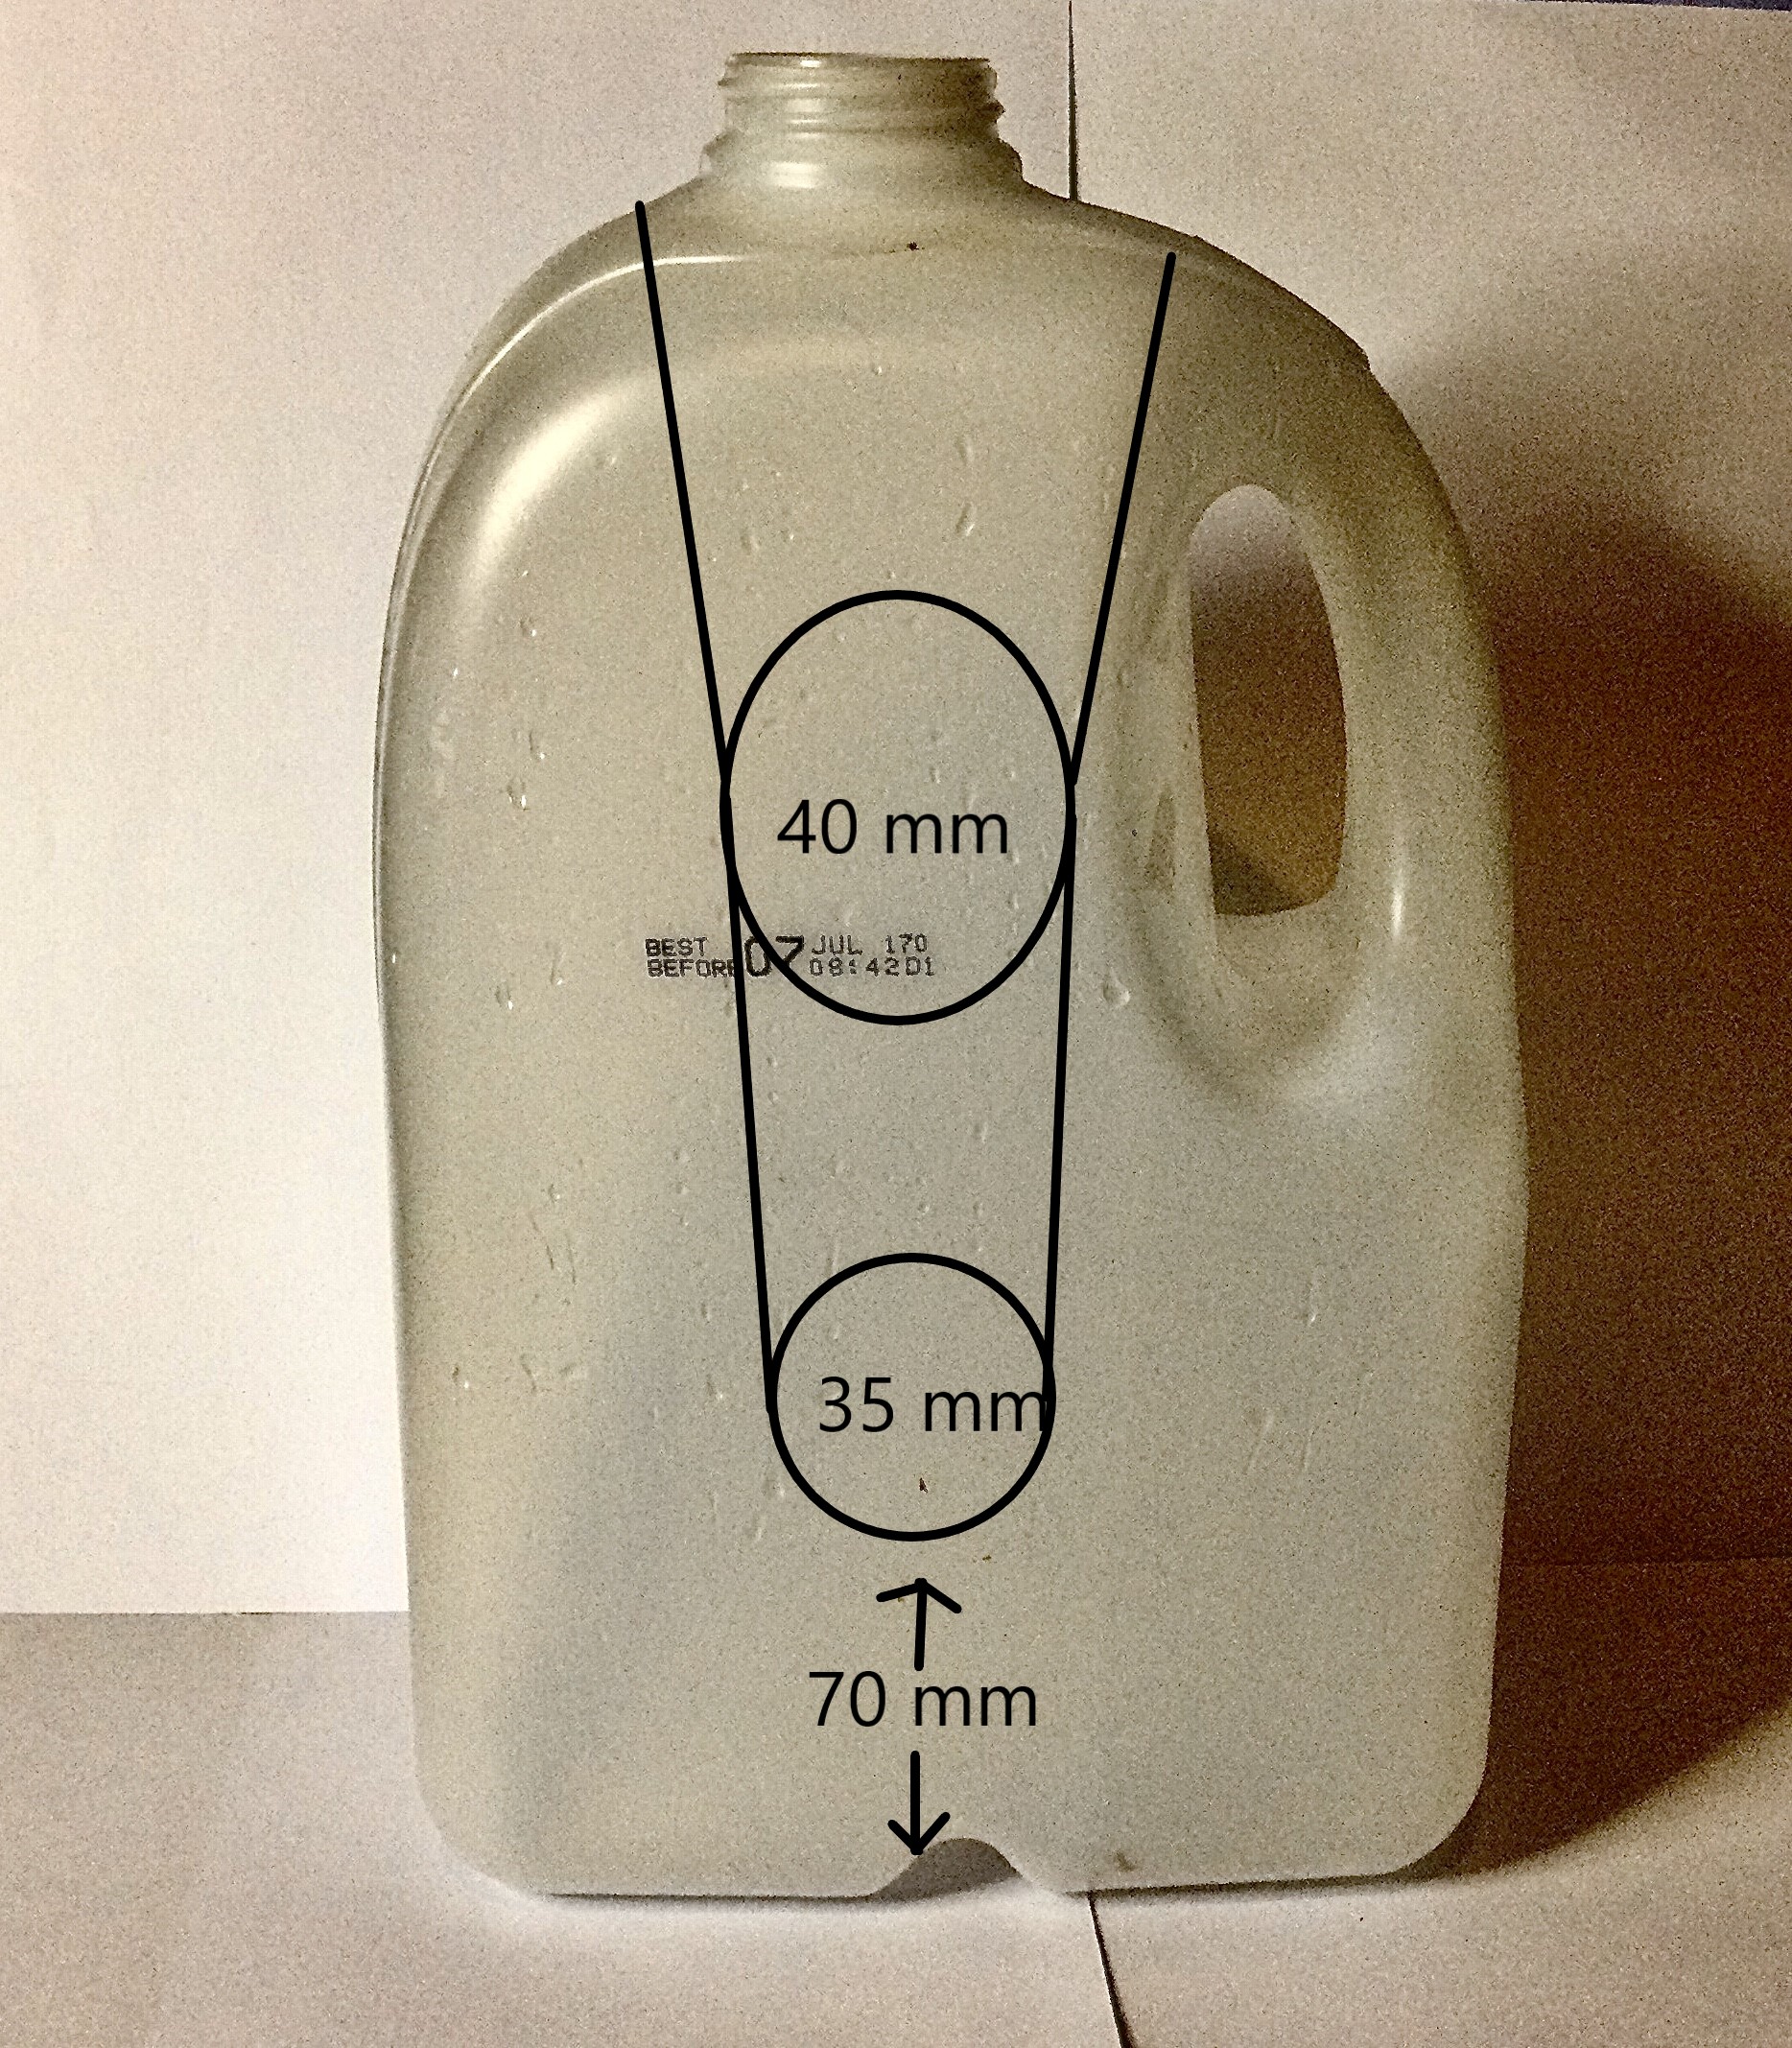
  1. Drill a 35 mm hole approximately 70 mm from the bottom of the bottle
  2. Drill a 40 mm hole roughly halfway up the bottle
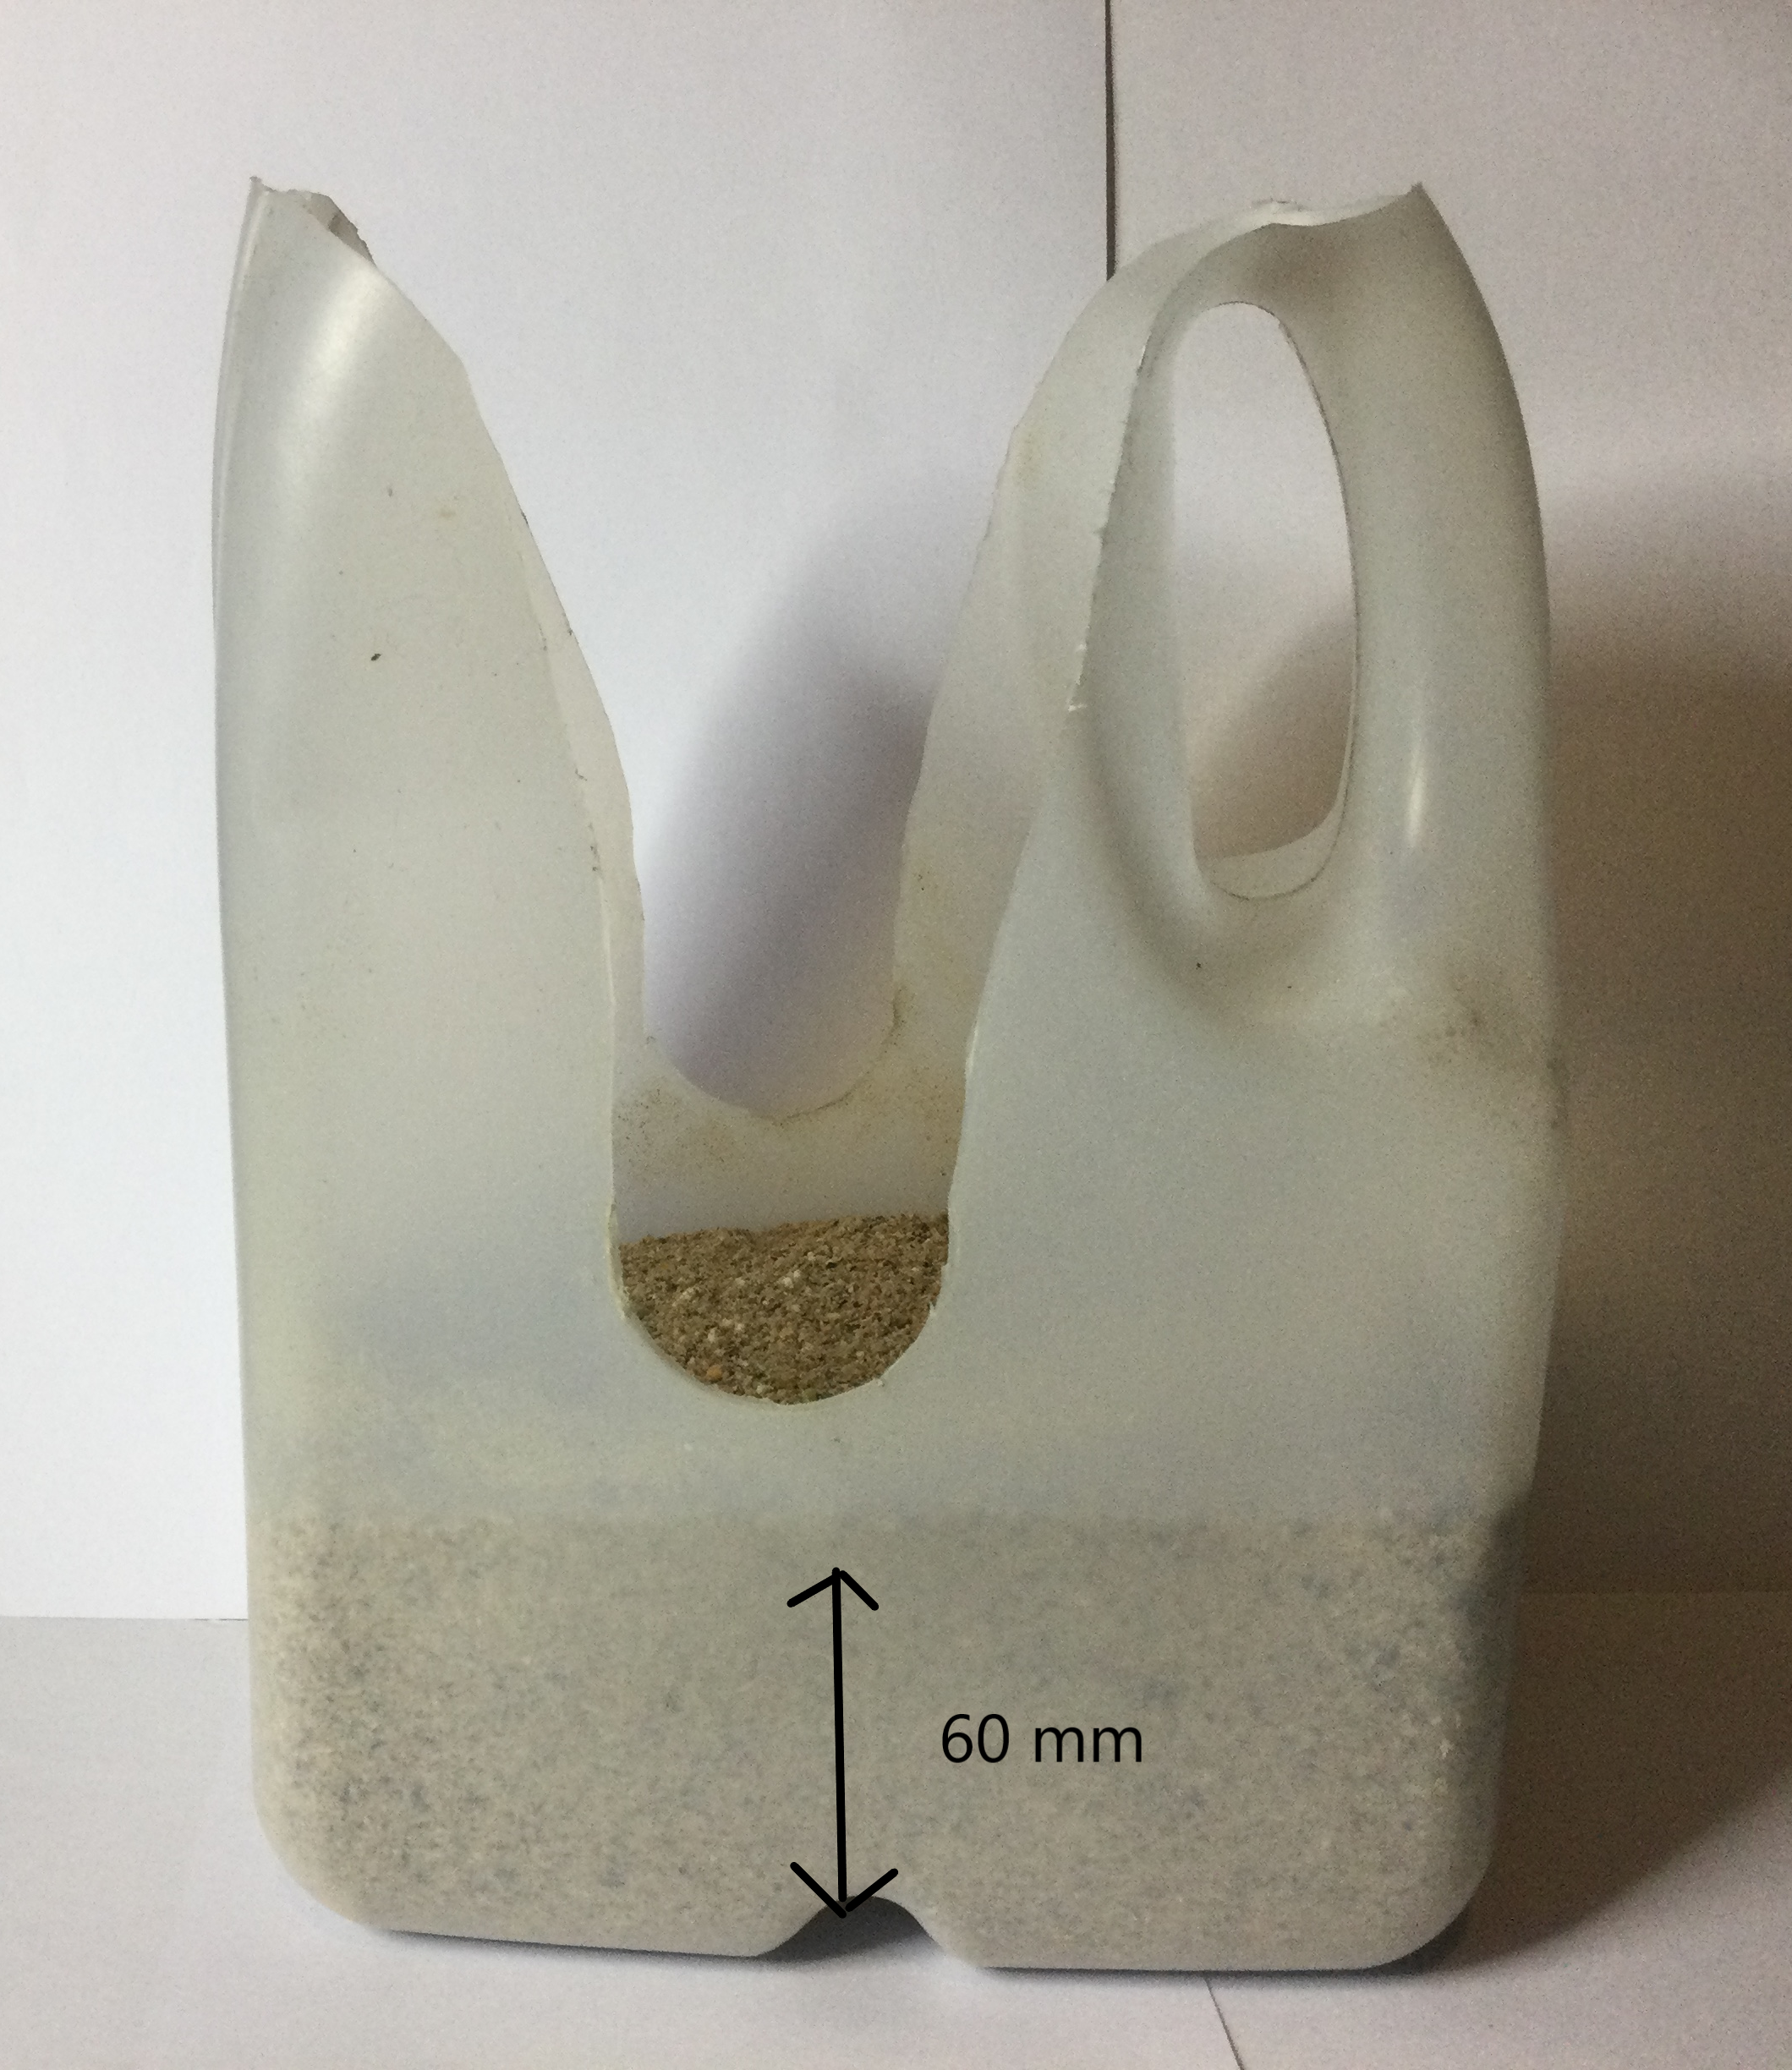
  3. Cut along the straight lines between the holes as shown in the images
  4. Now do the same onthe other side

You will end up with a durable, efficient feeder that allows easy access for the quails while minimizing waste.
Why This Feeder Works Better

Compared to commercial feeders, the BYF feeder offers several important advantages:

  • Quails cannot defecate in the feed
  • Quails cannot climb into the feeder and scratch feed out
  • The slot design allows quails to insert their heads comfortably and withdraw easily
  • Quails naturally flick feed sideways with their beaks, causing losses—this design prevents feed from being flicked out
  • The handle remains intact, making the feeder easy to carry and reposition
  • The feeder is easy to wash and keep hygienic
  • It can be moved around the cage to reduce trampling and ground damage

Feeding Capacity and Use

  • Fill the feeder to a depth of approximately 60 mm, which is about 10 mm below the bottom of the 35 mm hole
  • This holds roughly 650 g of feed
  • Quails cannot reach the extreme corners, so a small amount of feed remains, but one feeder easily supplies up to 6 birds for a full day

Daily feeding is simple:
Empty any remaining feed into a feed bucket, then refill the feeder using a scoop sized to deliver the correct amount (650 g). This also helps remix older feed with fresh feed, reducing waste even further

Daily feed consumption for mature Coturnix quails is about 30 – 35 grams (depending on many factors) and if you use more than this, there are either something sharing the feed with your quails, or wasteage is happening


Cost

Nothing.
Made from recycled materials, this feeder delivers excellent performance at zero cost